RBAC Configuration
Use groups to configure role-based access controls within the ChaosSearch platform.
Overview
Role-based access control (RBAC) is a method for controlling user access to the services and information. In the RBAC implementation for ChaosSearch, there are two main features:
-
Permissions define a user’s access to the system. The permissions information includes the following content:
- Version: tracks the permission information version, which is 1.0 by default
- Effect: whether to allow or deny access to the specified actions and resources
- Actions: a list of one or more capabilities that are being controlled (such as UI access or the ability create, view, or delete objects)
- Resources: a list of one or more ChaosSearch resources on which to apply the effect and action. Resources could include buckets, object groups, views, indexes, alerts, monitors, destinations, Search Analytics saved objects, Superset access, and so on.
-
Groups are resources that contain one or more blocks of permissions; users are assigned to groups to inherit the permissions. Groups have a name, an ID, and one or more permission rule sets. ChaosSearch has a default group that can be preconfigured for new user access levels, and the primary user can create other custom groups for more refined access rights for users.
A block is a specific permission control, such as allowing read access to one or more specific views, or to all views that match a condition value.
See Model User Roles within ChaosSearch for a list of several types of common user templates with examples of how to specify permissions.
Best Practices for Group Permissions and Access Setup
As you create groups to define permissions and access for your ChaosSearch users, there are some general good practices to keep in mind:
- Avoid specifying only the asterisk (*) wildcard character for resource names. It is better to use very specific resource names, even if multiple rules are required, to define the user's access requirements. Asterisks are convenient, but also very powerful. An asterisk specified by itself means that the user has access to all matching resources.
- An asterisk specified with a partial resource name limits the user to only the wildcard matching resources. If you use wildcarding with name strings, be sure to have a well understood naming policy for objects to ensure that there are common and well-known patterns for teams, departments, services, or business units.
- Avoid combining multiple resources in one permission block; it is better to have one block for each action and resource permission. While you can specify a comma-separated sequence of permissions in a block, the complexity for debugging permission issues increases, especially if wildcards are used in the Resources definitions.
RBAC Actions List
See Supported RBAC Actions Reference for the list of Actions values for groups.
Create RBAC Groups
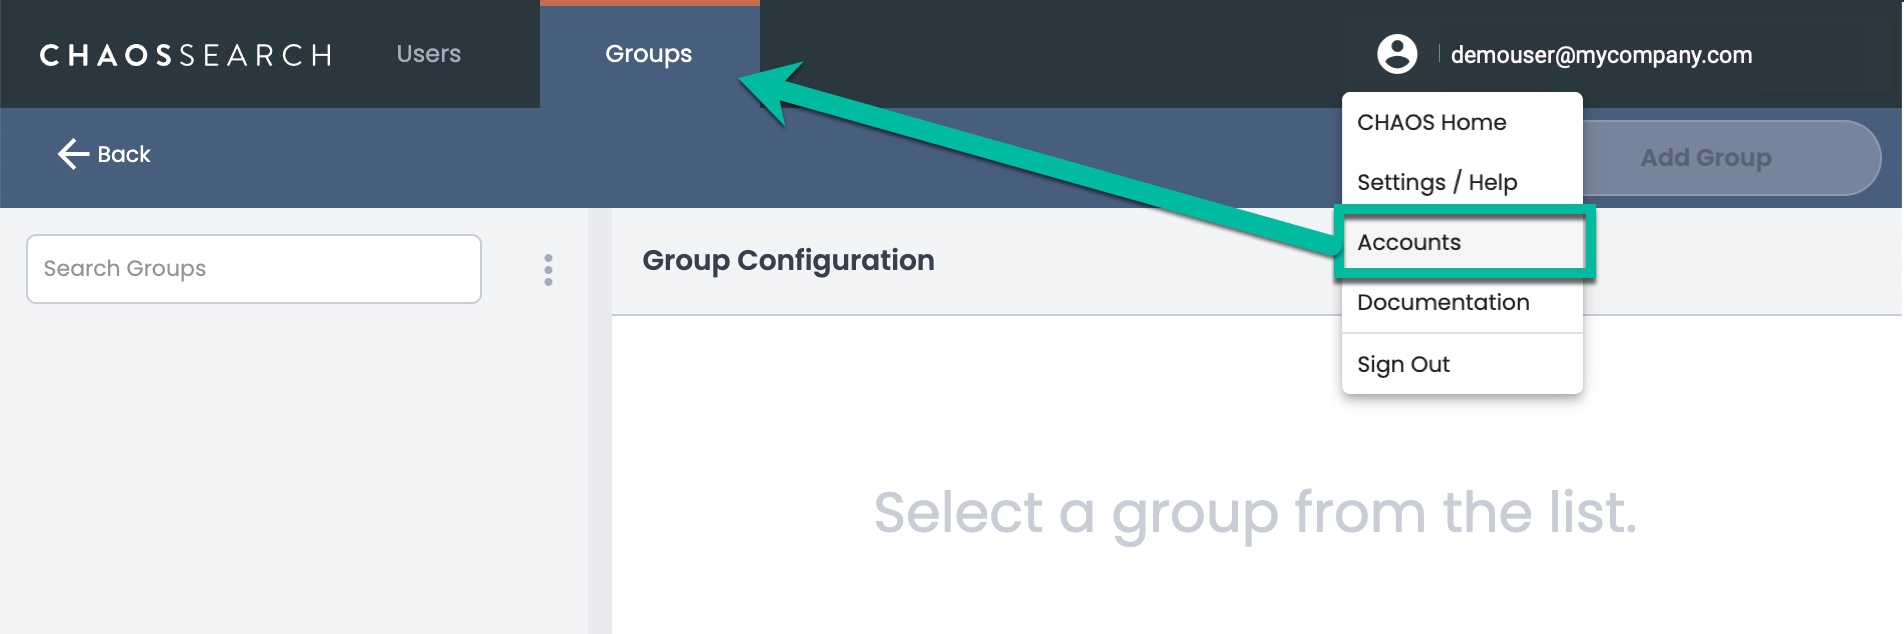
Primary users can access the Groups page by clicking their user name in the top-right corner and selecting Accounts from the pop-up menu.
The Users list is the default; click Groups to display the groups list.
To add a group:
- Click Add Group in the top right corner of the Groups page. The Add Group window appears.
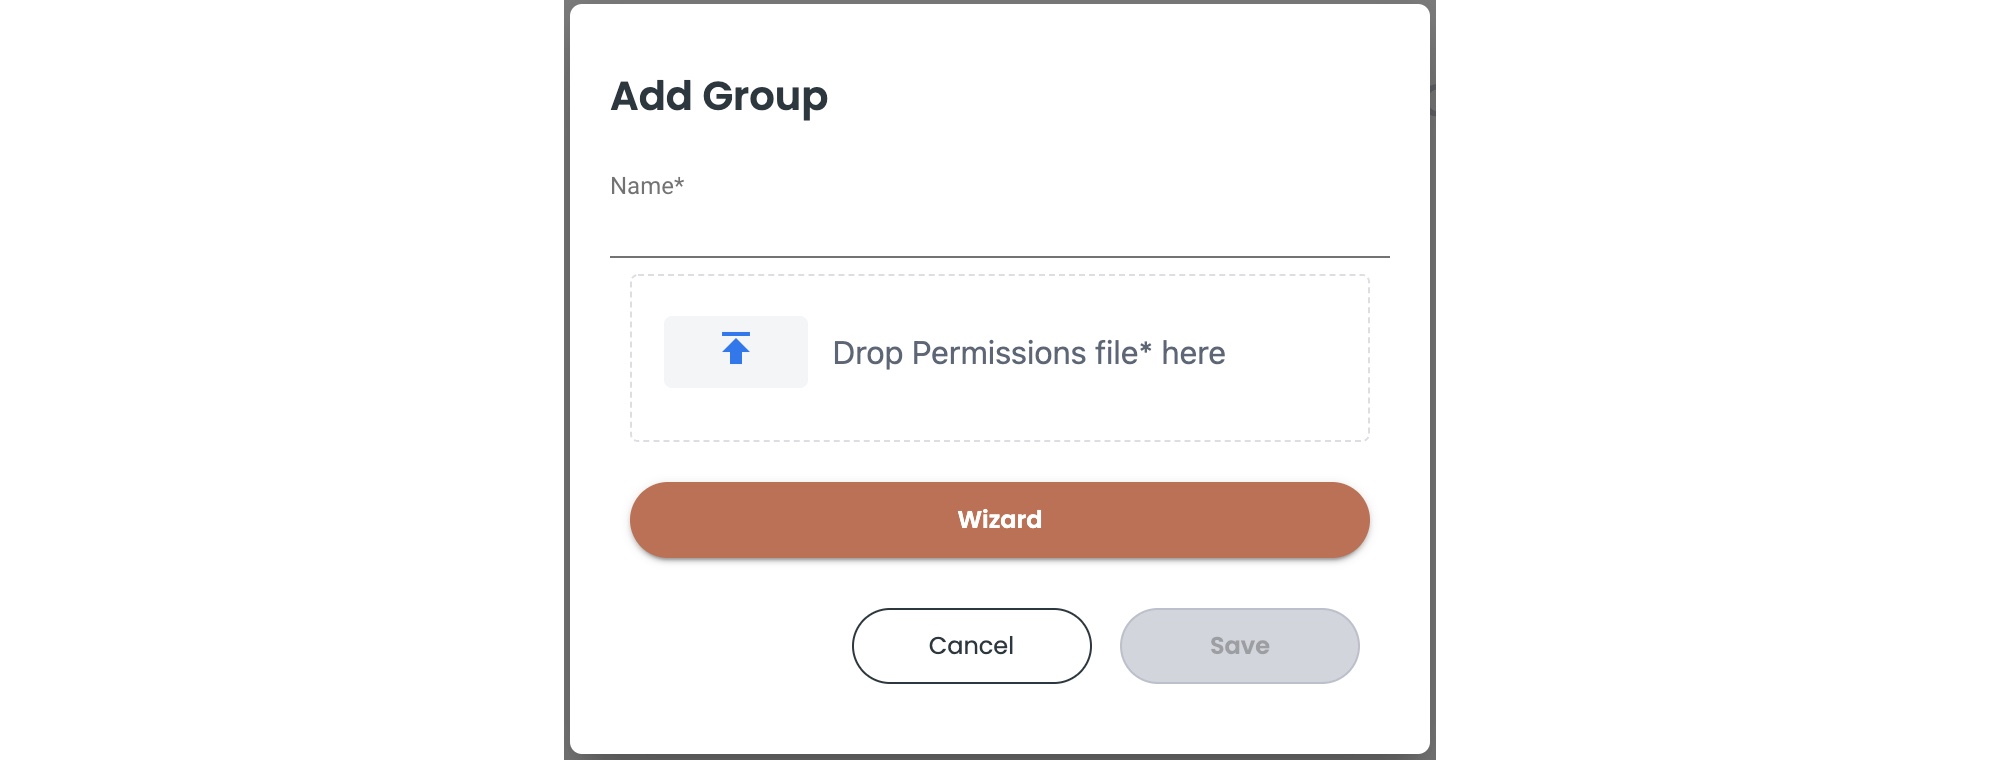
- Type a name for the group.
- Do one of the following to define the group:
- Click the upload icon for Drop Permissions file here. A file browser appears. You can import a pre-built JSON file of permission definitions, then click Save to complete the group. You can skip the rest of the steps which are specific to the wizard version.
- As an alternative to importing a JSON file, click Wizard to open a permissions editor. Each permission is defined as a block of effect-action-resource-condition definitions.
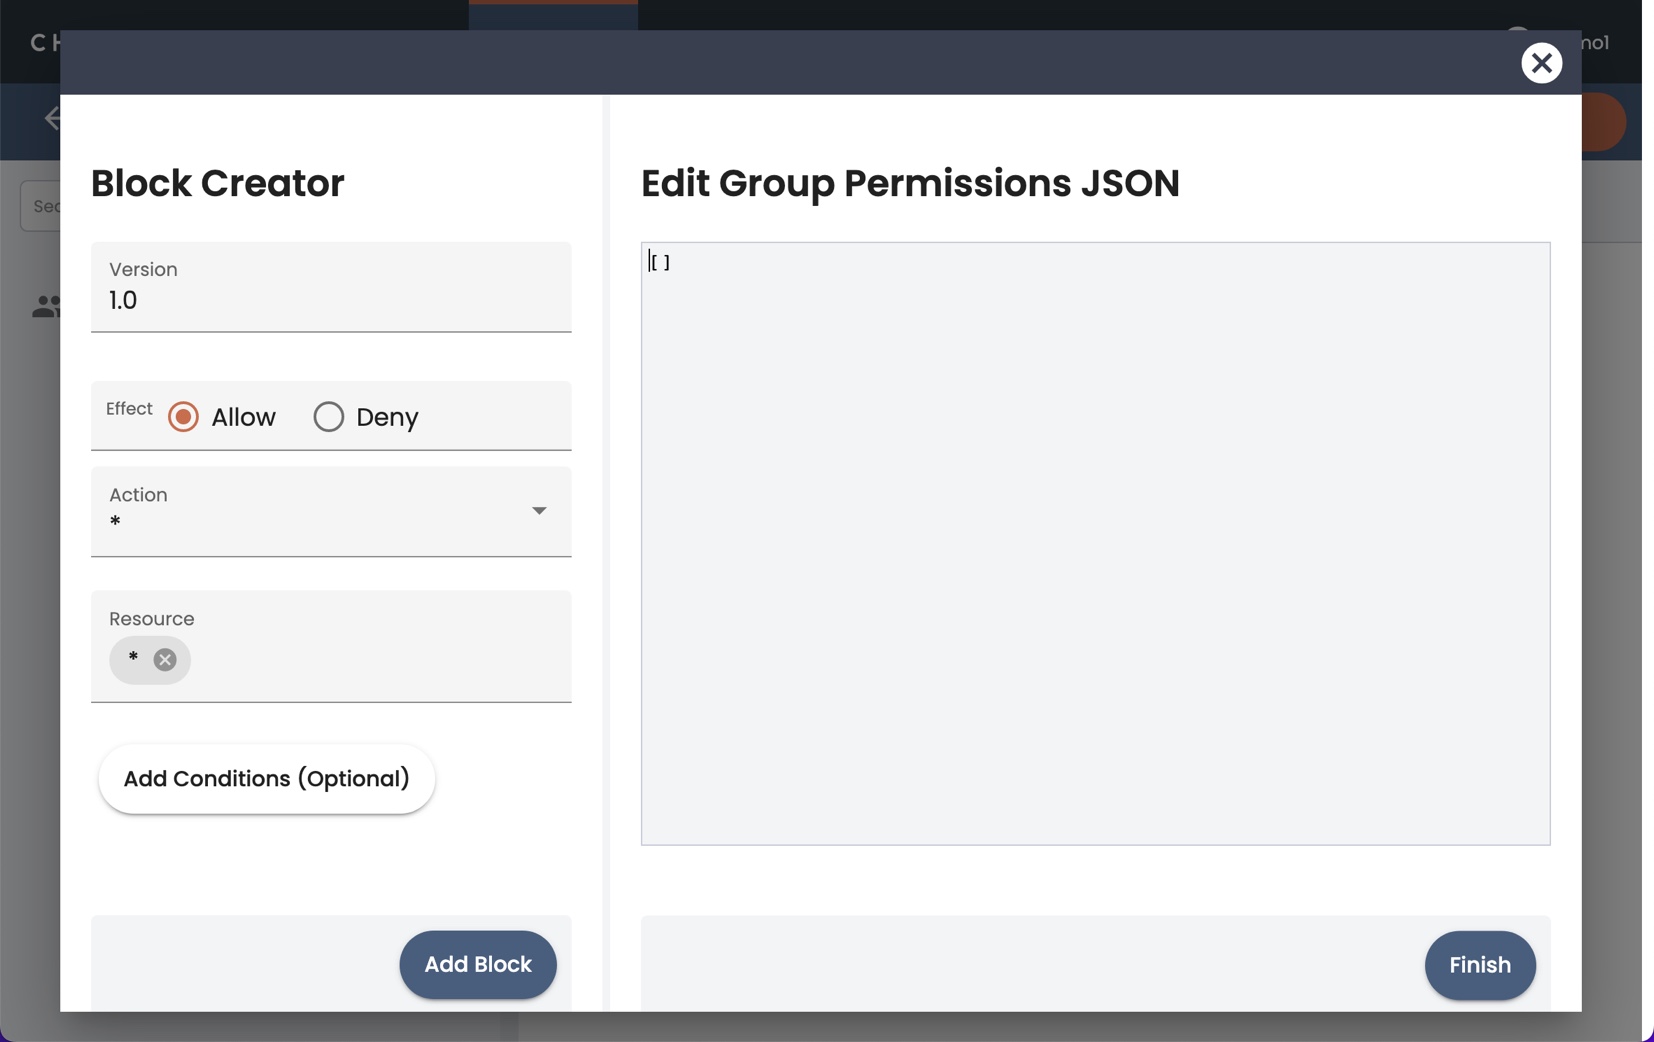
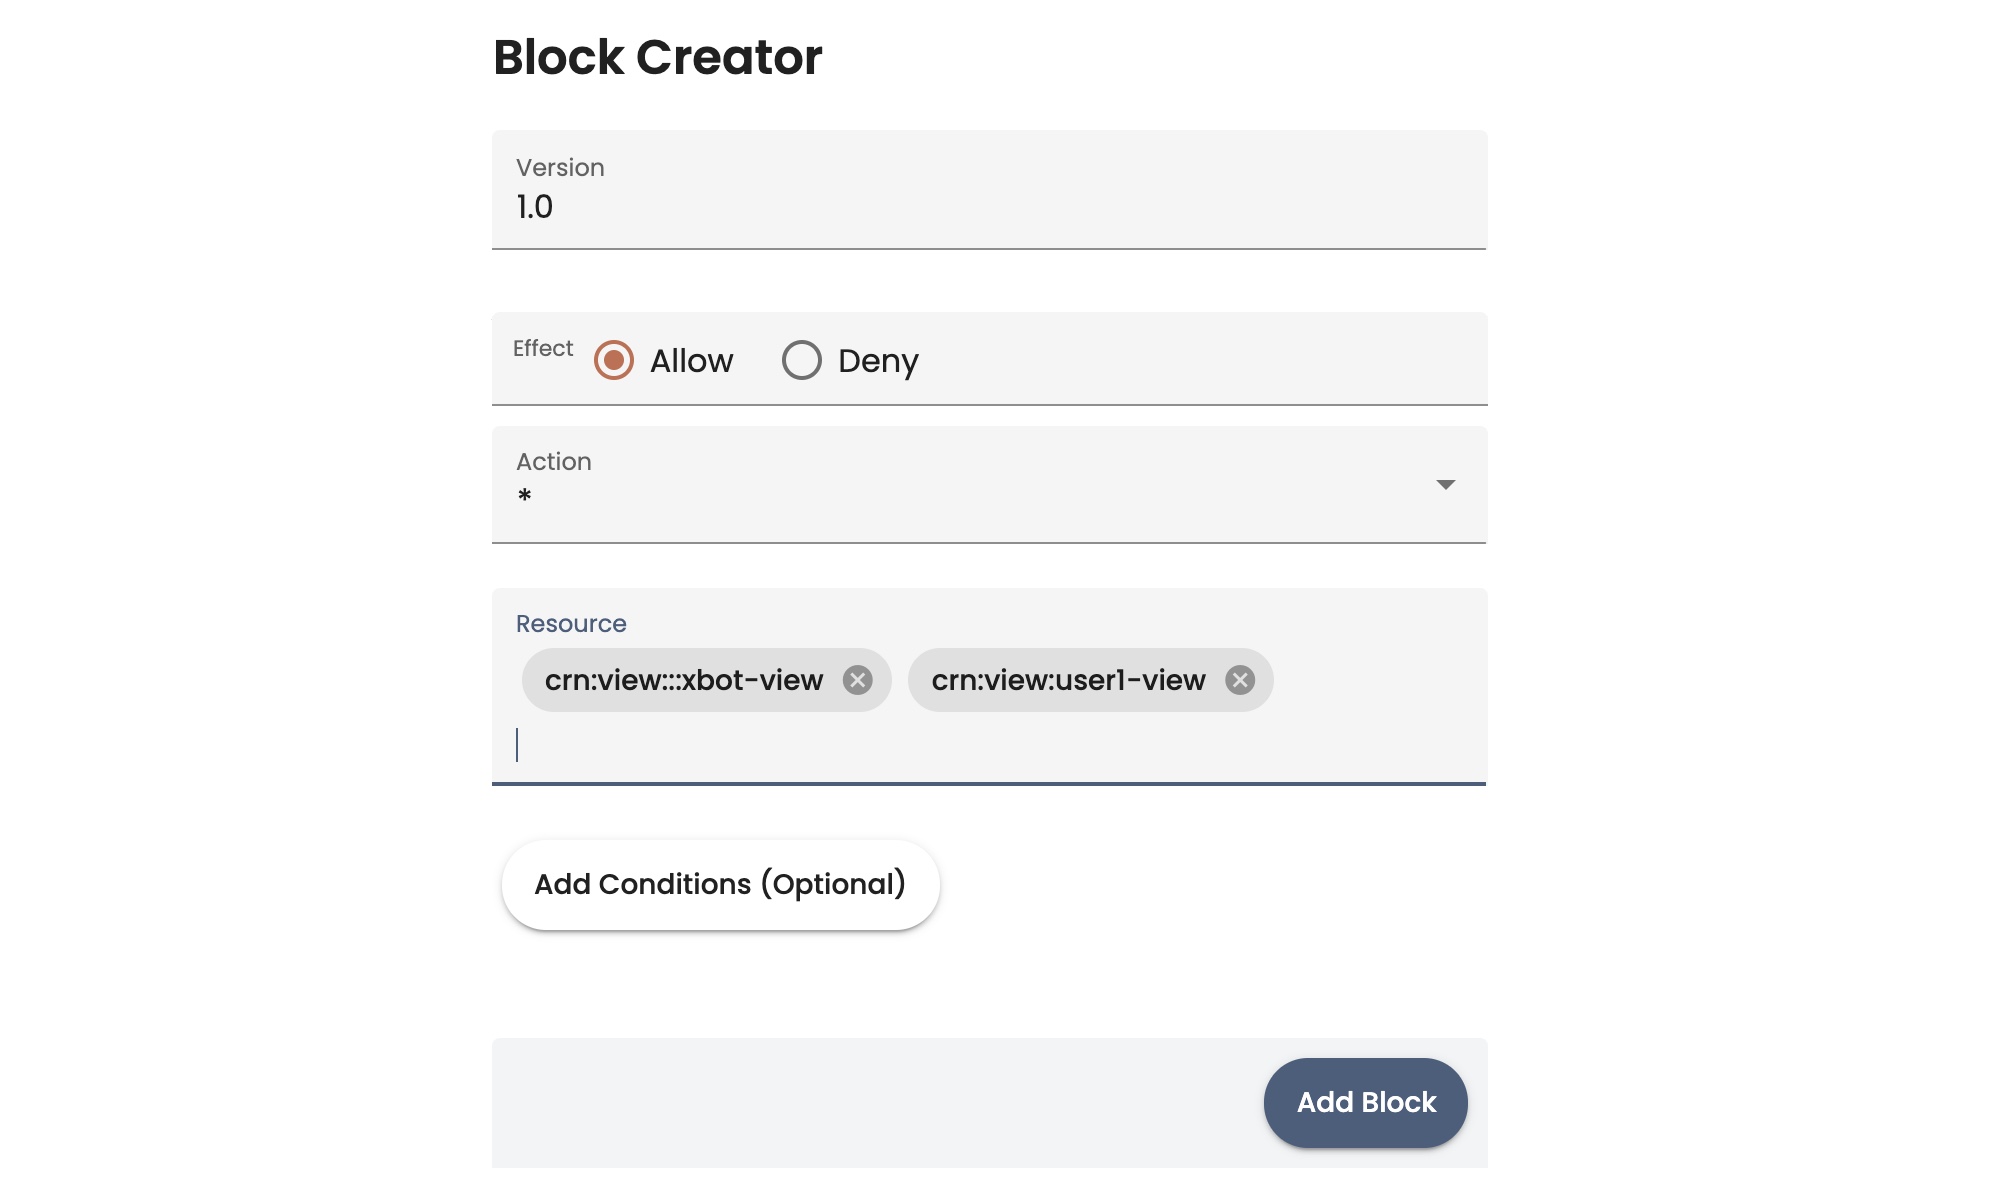
- The Version field specifies the version level of the permissions. You can use the default value of 1.0.
- In the Effect field, select whether you want to Allow or Deny the actions and resources that you are specifying.
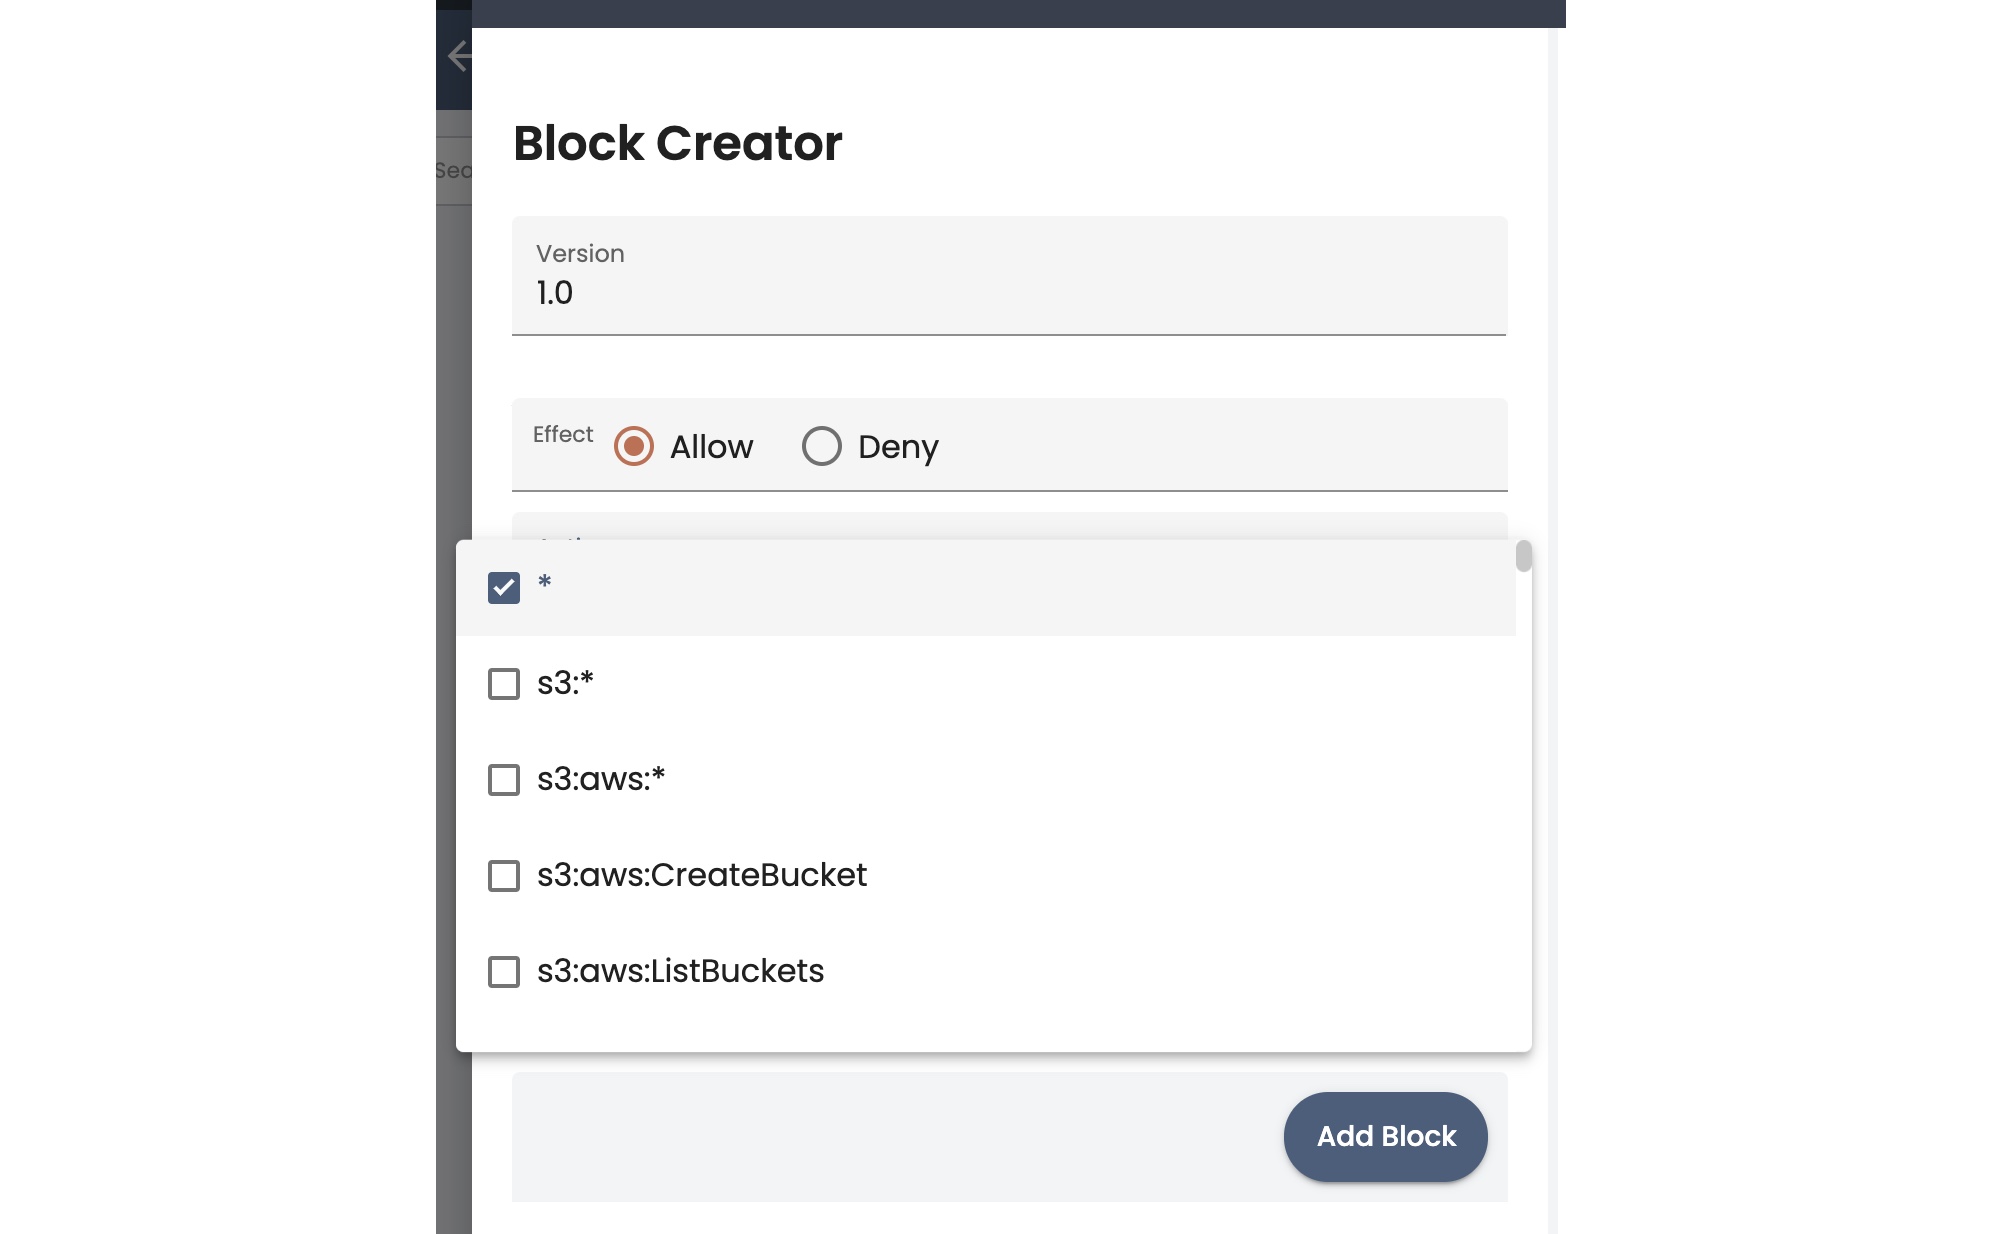
- Click the Action field, and in the pop-up list, select one or more of the RBAC actions. Note that the default selection is * (all-access). Typically you deselect * and select one or more actions for the group. Also note that the UI has a reduced list of Actions that you can select from; see the full list on the Supported RBAC Actions Reference.
Defining ResourcesIn the wizard, there are two ways to define resources: you can specify them in the Resource field, or use the Add condition option to create a resource condition block to match resources.
- The Resource field default value is * (all resources). To specify resources using this field, you typically deselect * and type the information for a specific resource, then press the Enter key to add it. You can type and enter multiple resources in one block, but the best practice is to create specific blocks for each permission and resource combination.
- As an alternative, you can specify resources using a condition. Click Add conditions (optional). New condition fields appear:
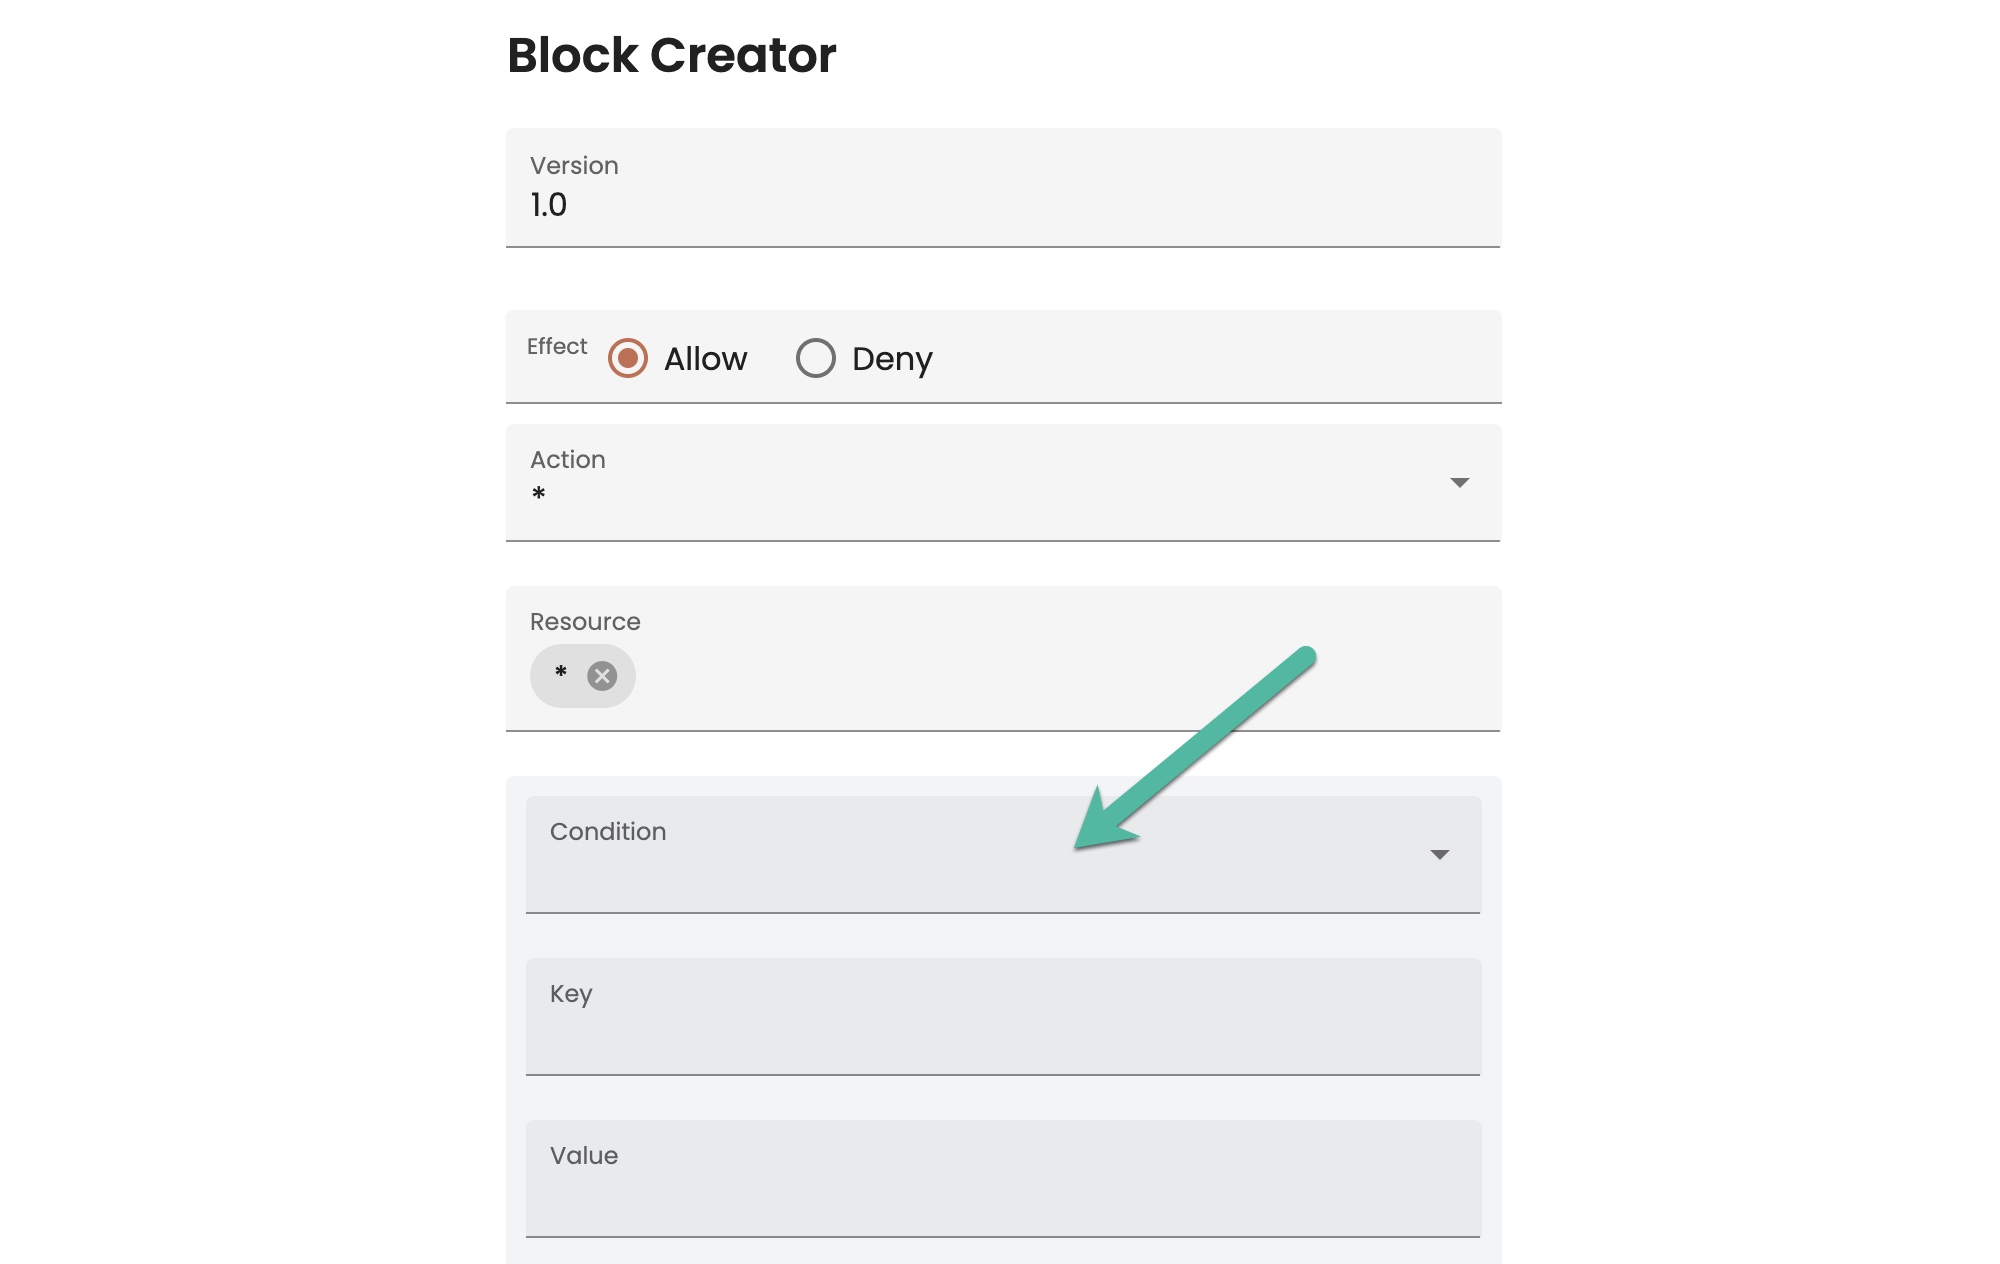
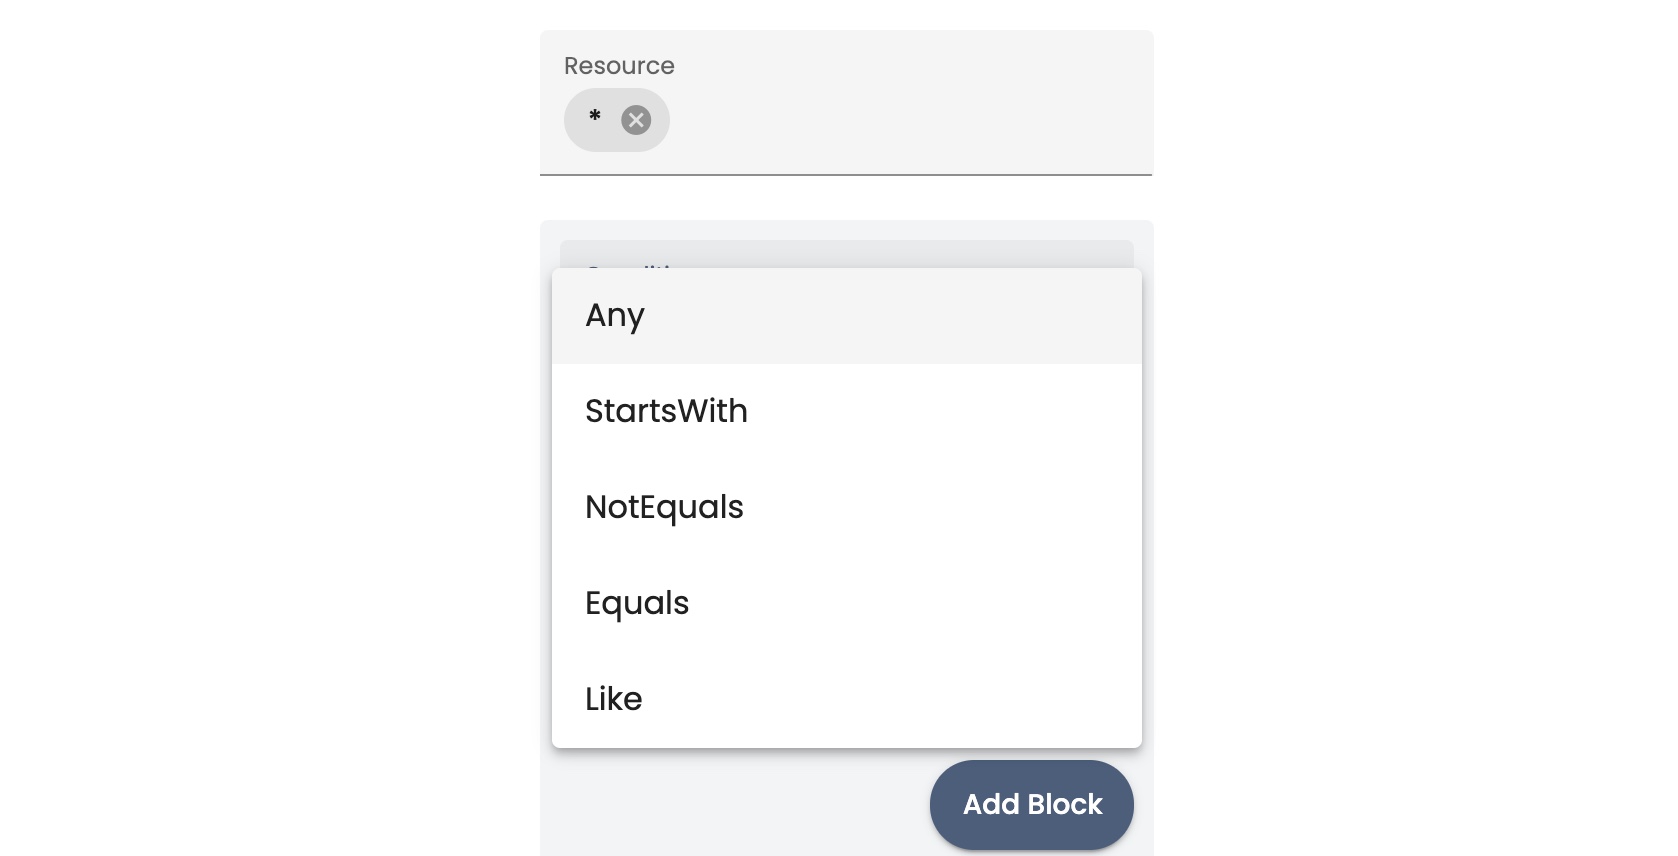
- To add a condition:
- Click Conditions and select a match condition:
- In the Key field, type the identifier for the object that you want to use in the condition. See Sample Resource Names for Groups for some common types of identifier keys.
- In the Value field, type a value for the resource key that you specified. For example, you could specify the name of a bucket, object group, view, and so on. You could specify a prefix string value.
You can add more conditions by clicking Add condition.
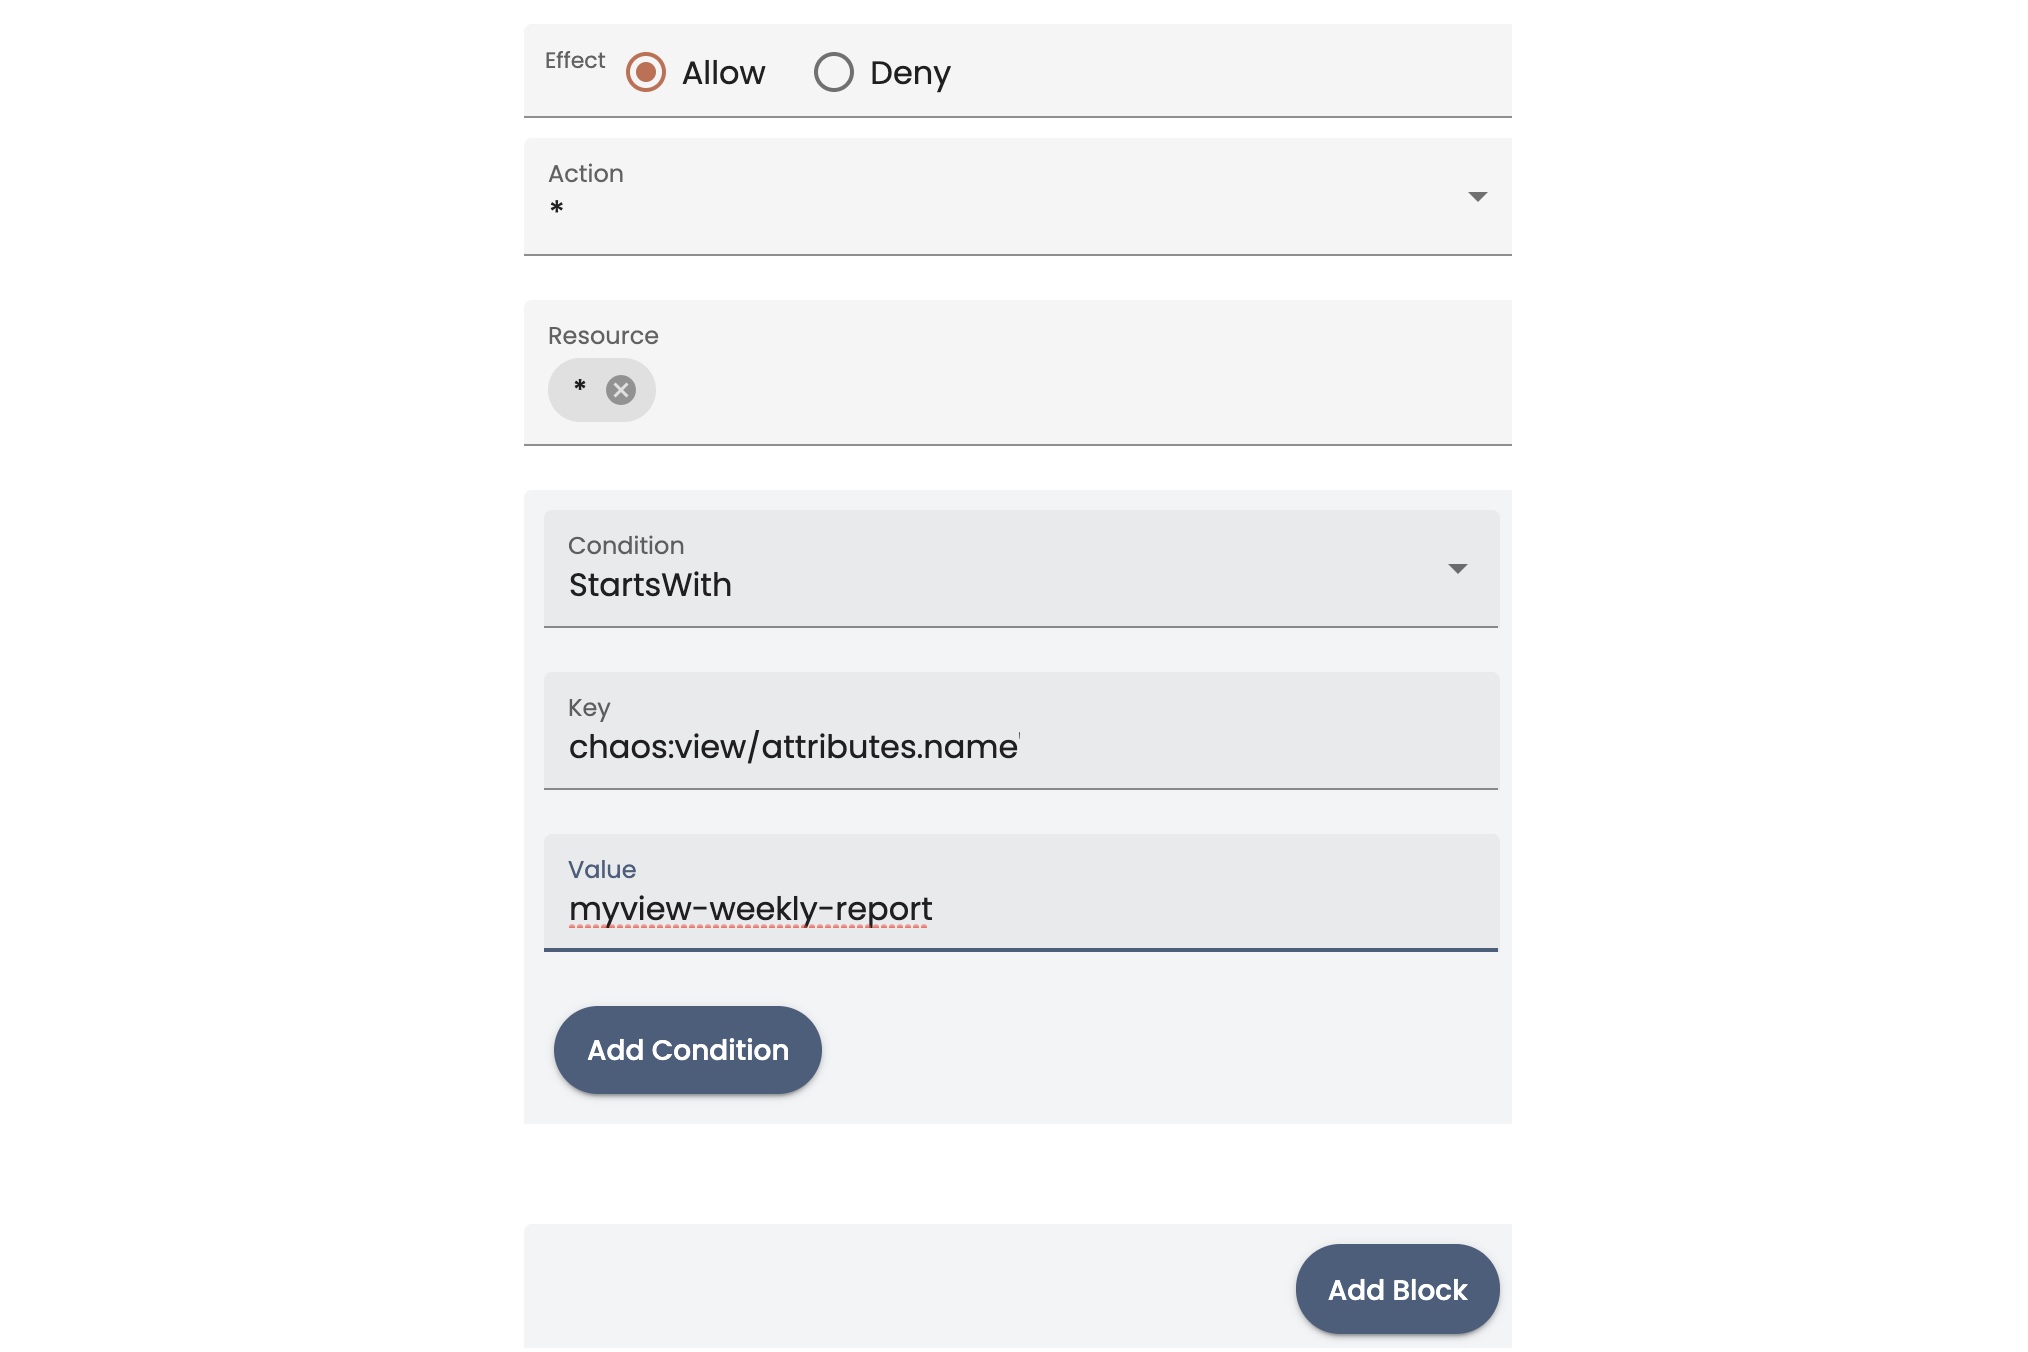
- When you finish the block for the permission, click Add Block.
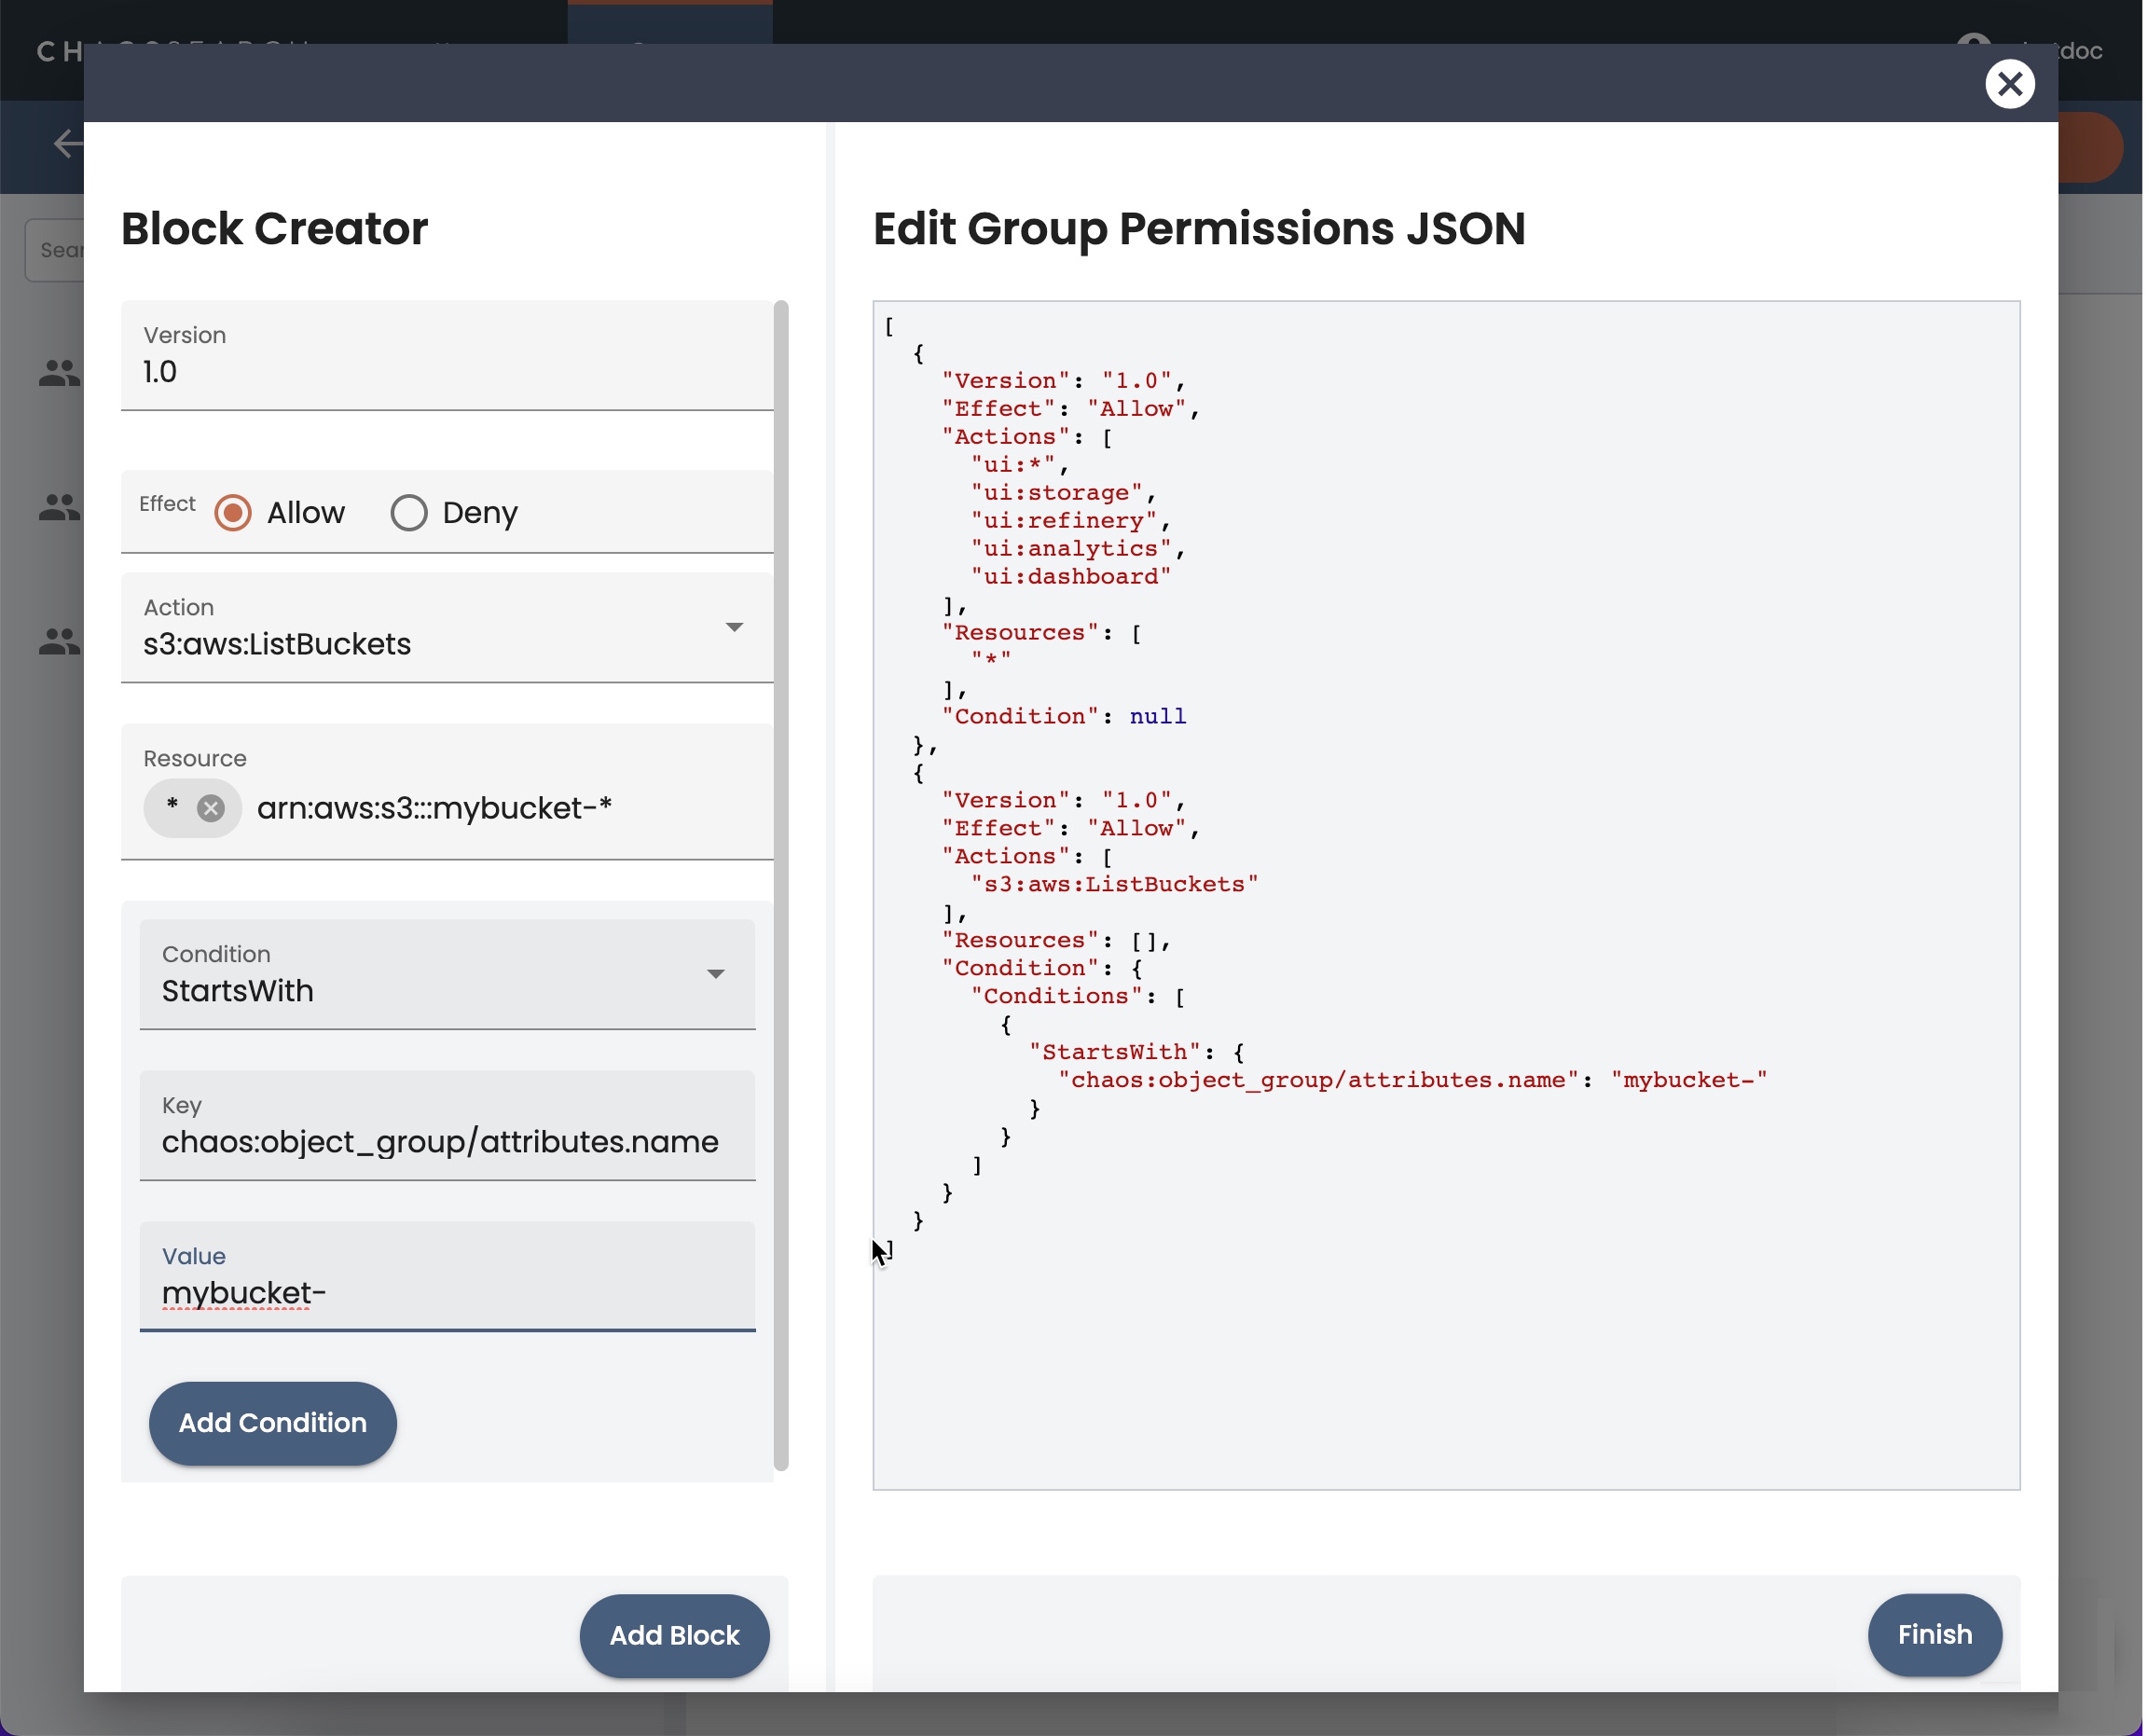
- When you finish adding conditions, click Finish. The Add Group window appears.
- Click Save to add the group. The group appears on the Groups page.
Assigning Users to Groups
After there are some groups defined for your users, you can assign users to groups.
-
When creating a user, the groups for your site are listed in the Add User > Groups list and you can select one or more groups for a new user.
-
For users that already exist, you can edit the user to change the Groups list and assign users to the correct groups.
Updated about 1 year ago