Bulk Query Export in Search Analytics
Run an Elasticsearch/Discover in the background and export an unlimited, complete result set to S3 for later review.
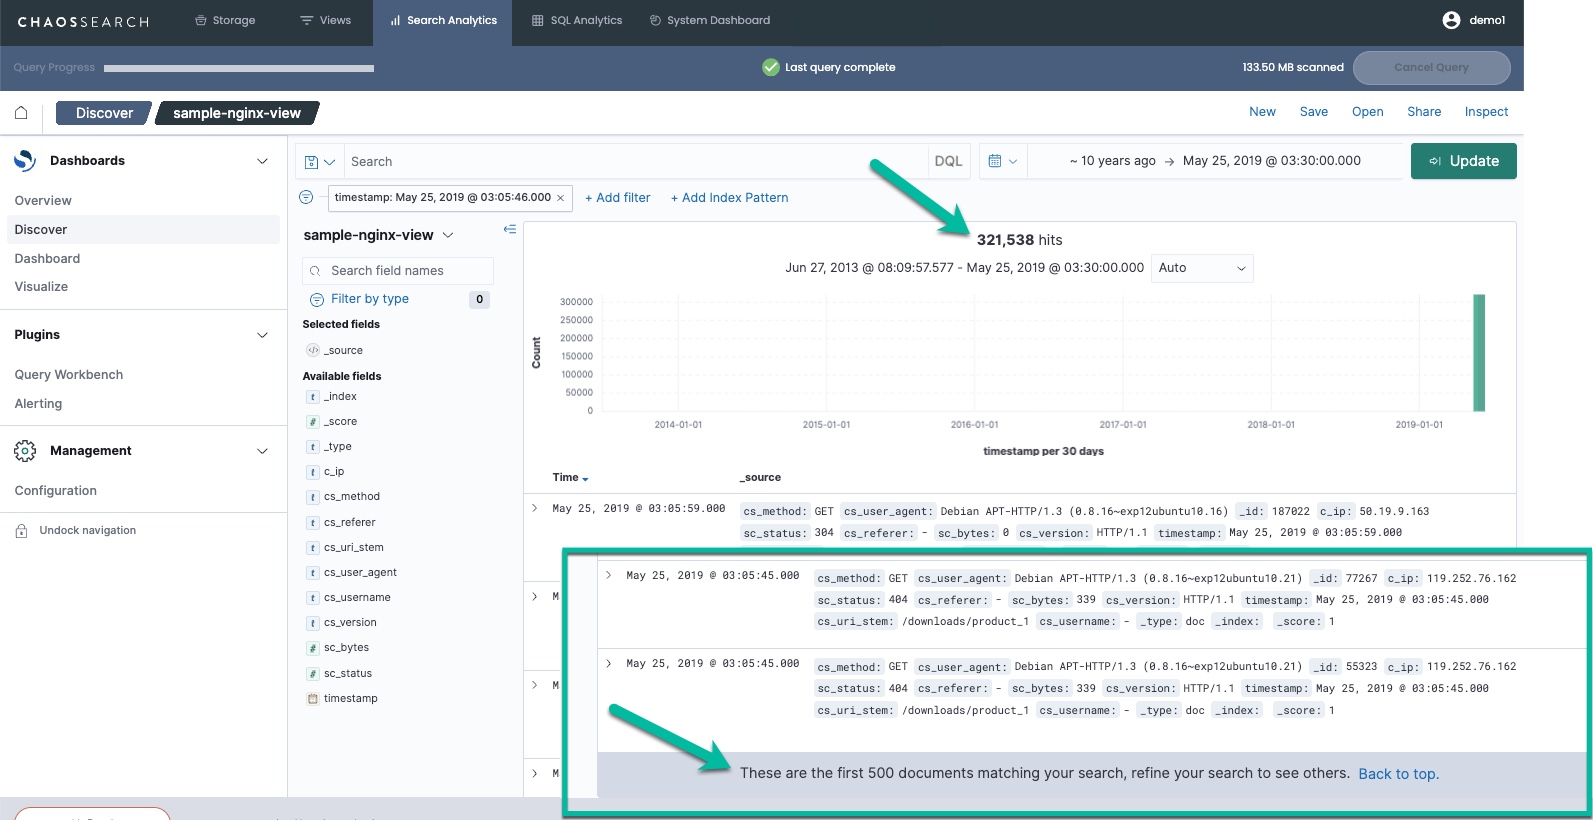
With Search Analytics > Discover, you can run an Elasticsearch query to obtain results from one or more views defined in ChaosSearch. The Discover results show the number of matching results (hits), but the Discover result set is usually capped in the user interface to 500 rows by default to manage the memory needed to process the result set.
As you can see in the example below, Discover found over 300,000 results, but the browser setting limited the display to 500 rows to manage the memory and the processing time for large result sets.

If you want to review all of the matching results for a search query, you can use the optional bulk query export feature to run the Elasticsearch query as a background operation that is not limited by the user interface row limit.
The system runs the query and exports all of the rows in the result set to files in an AWS S3 bucket. You can review the progress of the export and gather the complete result set after the search and export are complete.
Use caution if your query result set could have many millions or billions of rows.In this early access version, the bulk query export has been tested with search result sets that have millions and tens of millions of rows. As a good practice, keep the result set row counts below those levels. Contact ChaosSearch Customer Success for more information about bulk query export and enabling this feature.
Run a Bulk Query Export
You use the Bulk Query Export API endpoints to search, export, and obtain the status of the export. You can also use run and view exports from the ChaosSearch console:
- From a Search Analytics > Discover window
- From the Bulk Export UI area (see Bulk Query Export for more information)
To run a bulk export from the Discover window:
For environments where the bulk query export feature is enabled:
- Use Discover to run a search for the results that you want to analyze.
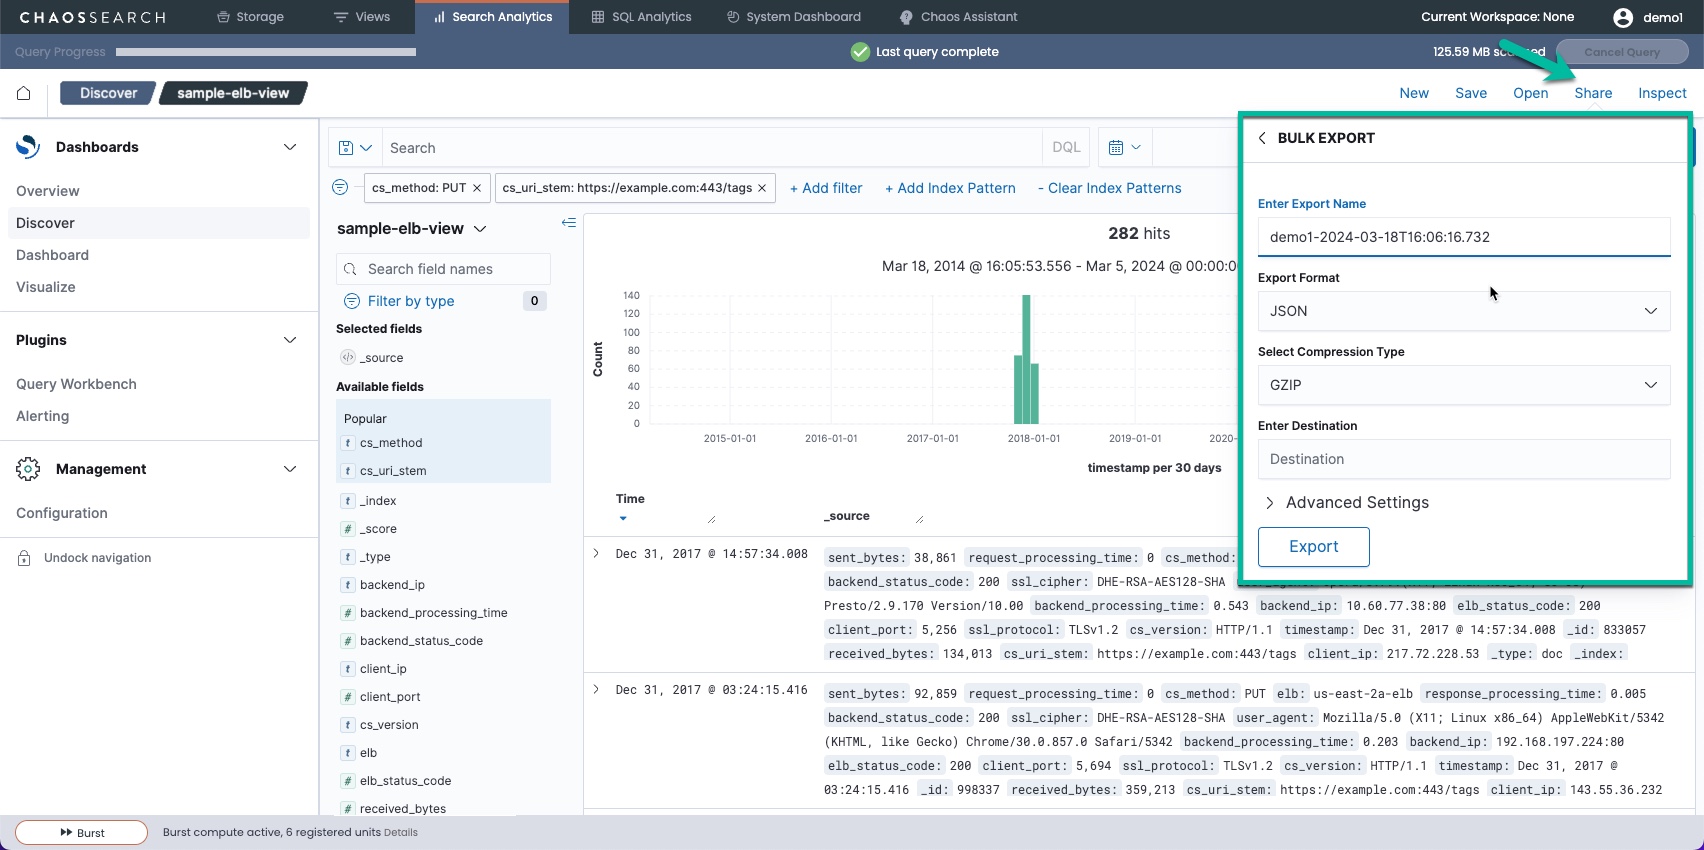
- Click Share > Bulk Export to open the Bulk Export window.

- In the Bulk Export window, specify the following information:
- Type a name for the query export task. The default is
<user_name>-<current_date>. - Select an export file format such as JSON (default) or CSV for the exported files.
- Optionally select a compression type for the exported files. The default is GZIP, or you can choose None.
- Type the cloud storage bucket destination for the exported files. For example,
my-export-bucket/export-data.
- Type a name for the query export task. The default is
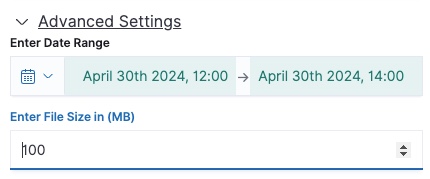
- Optionally, click Advanced Settings to display the following options:

- If desired, specify an updated date range to use for the search and exported results. The default is the range used in the current Discover search. Use caution before running an export for a very wide time range; review these Important Notes.
- Specify a maximum file size for the exported files. The default is 100 MB. Bulk export runs a distributed set of parallel queries for performance; the exported files could vary in size but will not exceed this maximum size.
- Click Export.
- The export process runs in the background to schedule the work, gather the results, and export them to the target storage location. It can take a few minutes to start the export, and the export will be executed using multiple concurrent queries to export results efficiently.
Use the Bulk Export UI to watch for the status and completion of the bulk query export operations, or for any errors or problems with export processing.
Updated 9 months ago
