Managing Your Buckets
Use Storage to view and manage your storage buckets, object groups, and indexing.
The Storage area is where you review and manage the available cloud-storage buckets and the objects that they contain. From this page you can also create and manage the object groups to filter those cloud-storage objects for indexing.
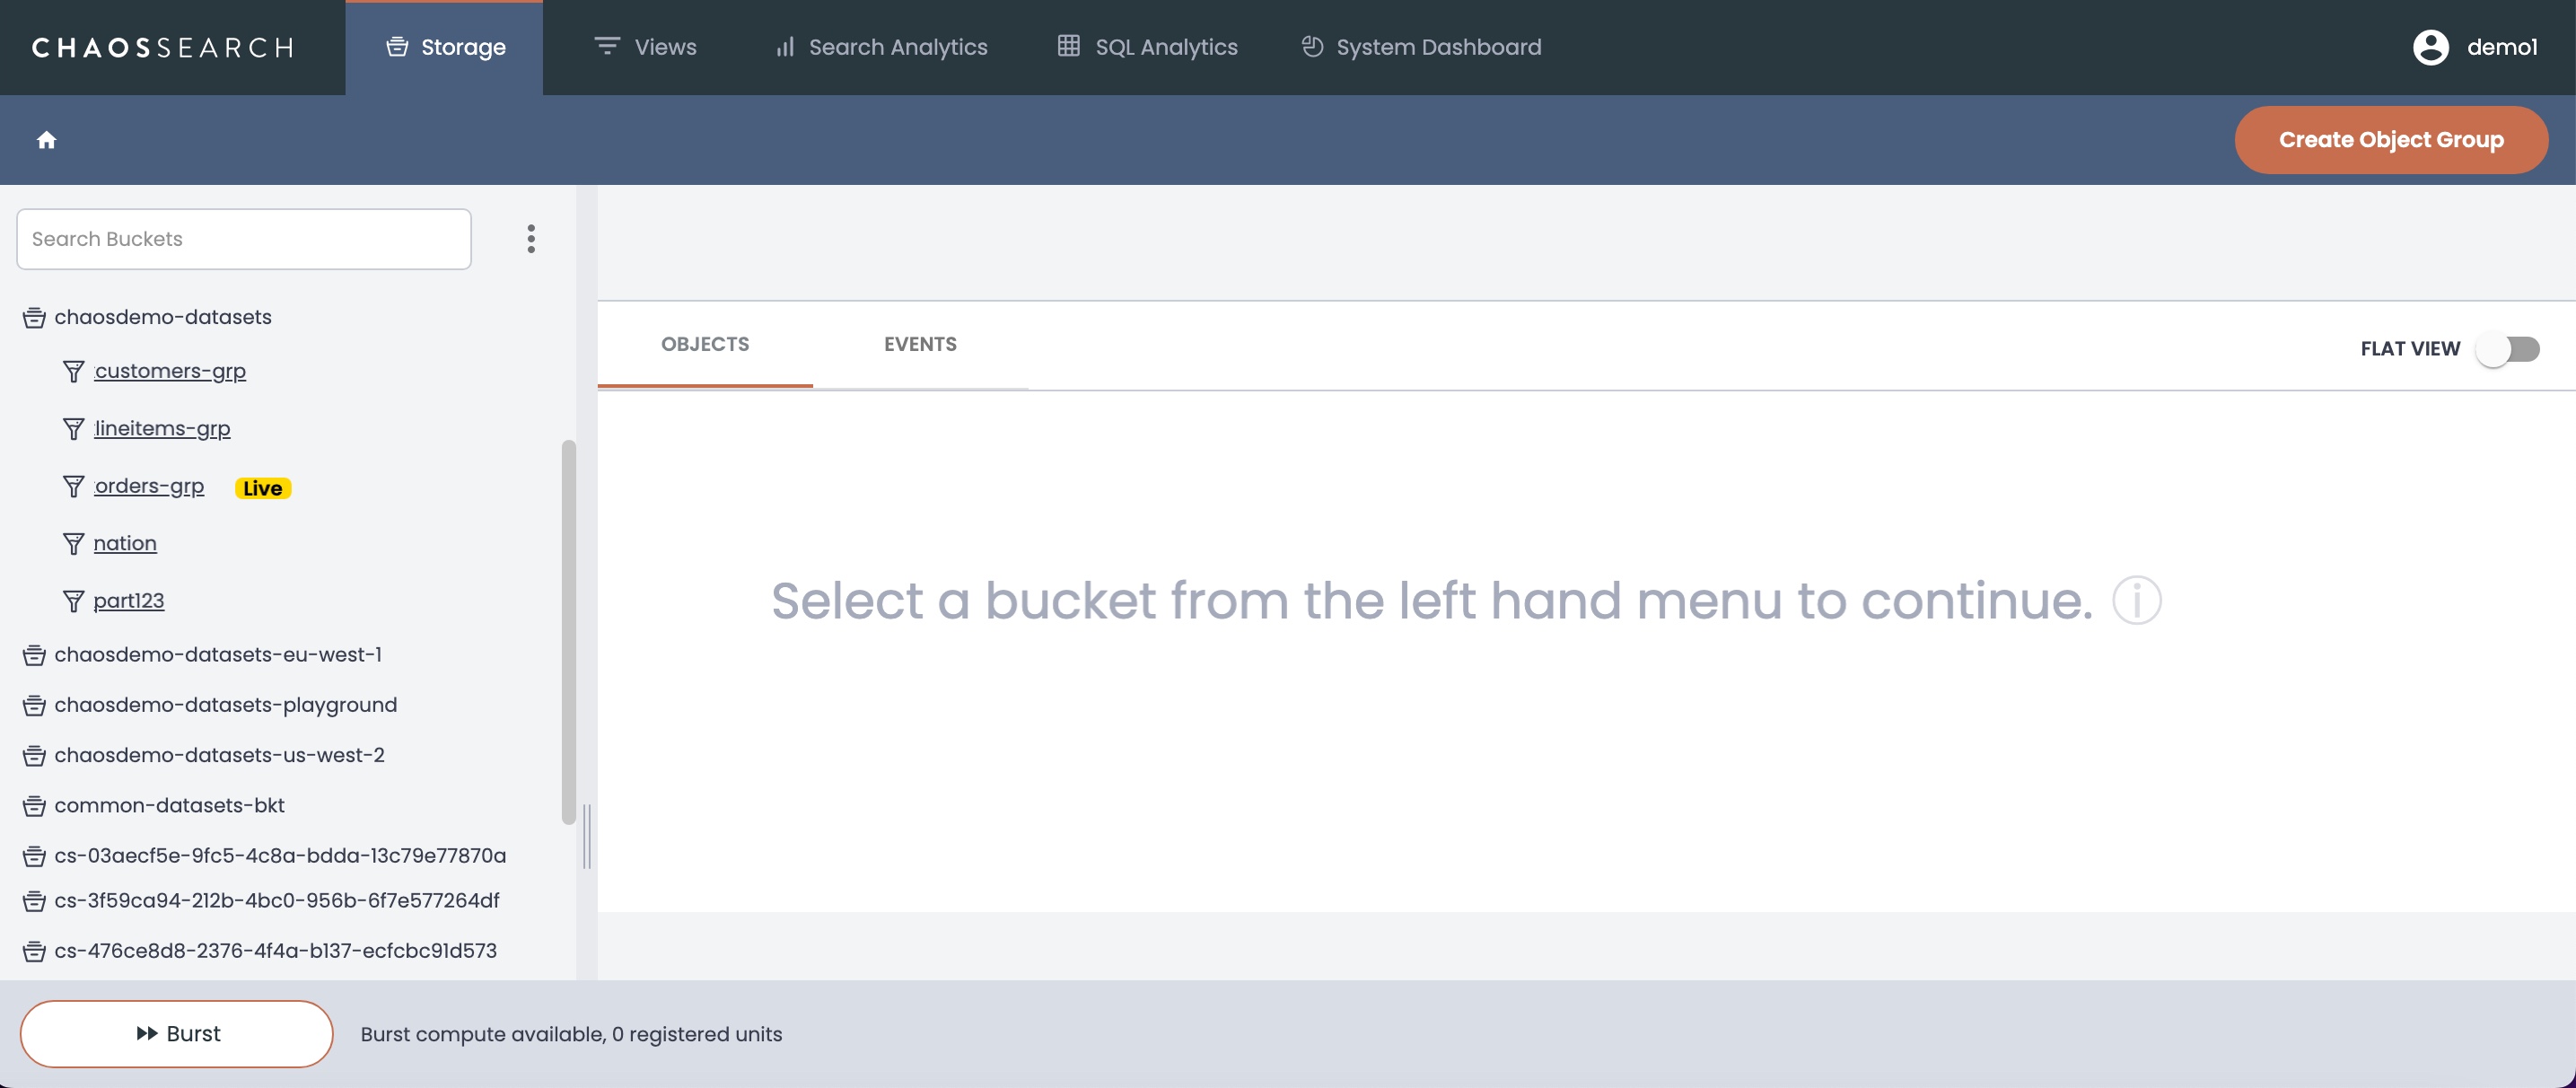
When you select a bucket, the list updates to show any object groups defined in the bucket. The Live label indicates that a group uses live indexing. Note that you cannot navigate inside a bucket if your account does not have access to the bucket.
In the main panel, use the Objects tab to navigate into the contents of the storage bucket. You can see folders as well as cloud-storage objects like the log and event files written to those areas.
Searching for a Bucket or Group
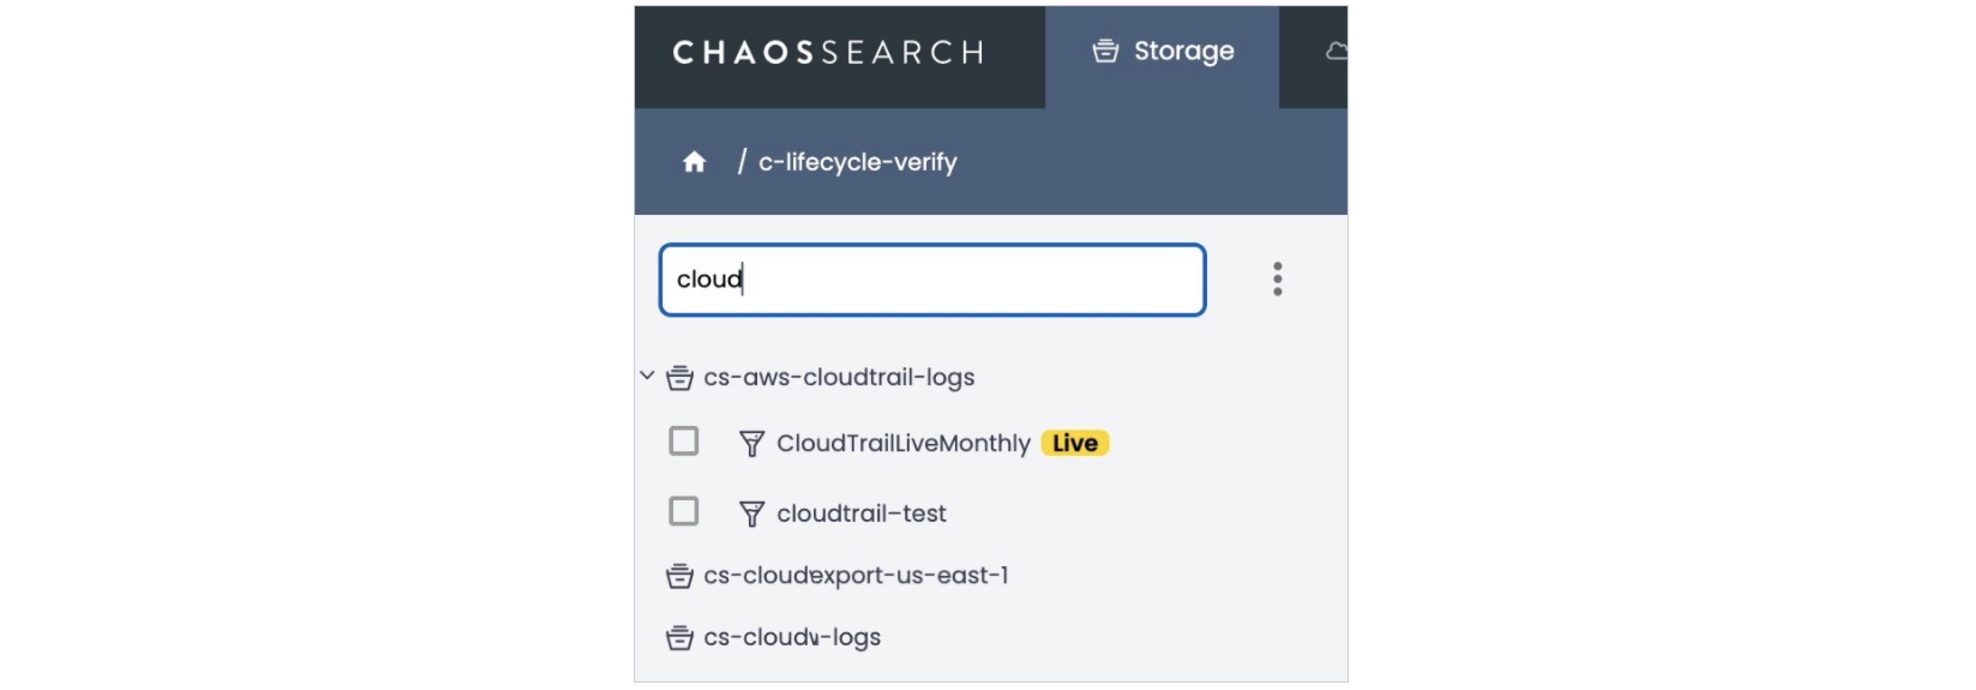
Type a string in the Search Buckets field to locate matching cloud buckets or object groups. The filter performs a case-insensitive match and displays the bucket names and any object group names that contain the string. For example, searching for the text cloud reduces the list to the bucket and group names that contain that string.
As another example, the filter vpc displays object groups that match the filter, even though the bucket name does not:

Sorting the Buckets List
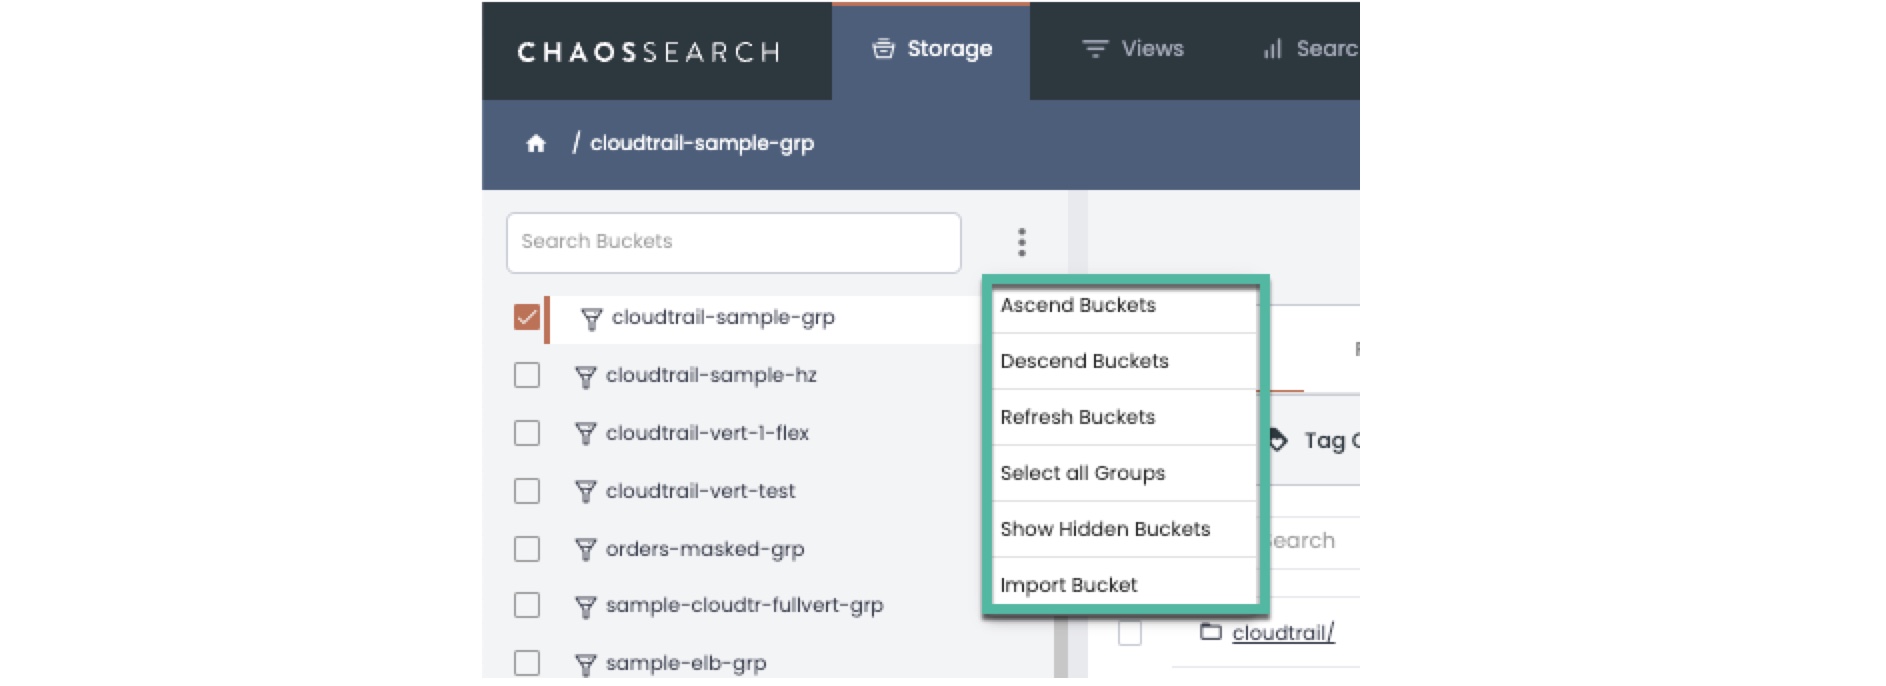
Click the three-dots icon (stacked ellipsis) to the right of the filter to display a menu of bucket list actions. For example, you can sort the bucket names alphabetically using the Ascend Buckets or Descend Buckets selections.
Update the Buckets List
Use the Refresh Buckets option to update the Storage display with the latest buckets and information.
Select all Groups
Use the Select all Groups option to select all of the object groups in the Storage tab. This is a rare option that could be used for test environments to do such tasks as stopping indexing, starting indexing, or similar actions. Use with caution especially in environments where there are a large number of object groups.
Show Hidden Buckets/Show Visible Buckets
Buckets can be marked as visible (the default) or hidden to users. A hidden bucket is not shown in the default Storage list, but it is still accessible for object group filtering. You could hide a bucket when it contains test data or files that are not of interest to your general users.
Use the Show Hidden Buckets menu to update the Storage list to show only the hidden buckets. The Storage tab updates to show only the hidden buckets, and displays a banner message.
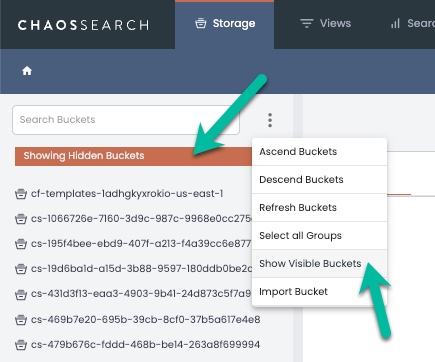
To return from the hidden buckets display to the visible buckets display, click the ellipses menu and select Show Visible Buckets. You can also click any other tab to change the page, and then click the Storage tab. The default Storage tab display shows only the visible buckets.
To configure a bucket as hidden:
- In the Storage tab, select the bucket and click the ellipses that appear at the right side of the bucket name.
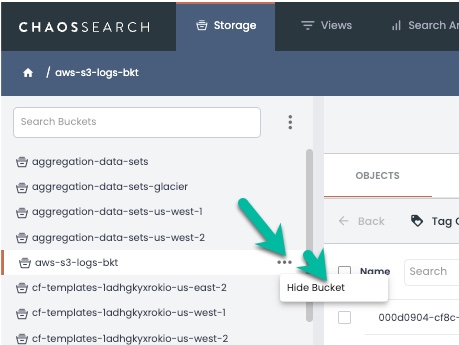
- In the pop-up menu, select Hide Bucket.
The selected bucket is marked as a hidden bucket, and will no longer appear in the default list on the Storage tab. You can view the hidden buckets only from the Show Hidden Buckets display.
To change a hidden bucket back to a visible bucket:
- In the Storage tab and the Show Hidden Buckets display, select the bucket and click the ellipses that appear at the right side of the bucket name.
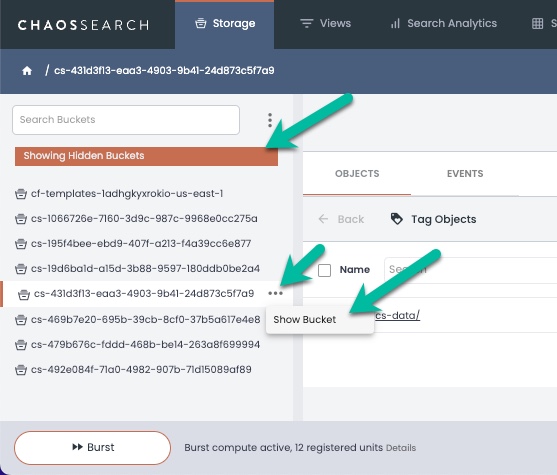
- In the pop-up menu, select Show Bucket.
The selected bucket is marked as a visible bucket, and is removed from the hidden buckets list. The bucket will now be visible to users in the default Storage tab list.
Import a Bucket
You can import a bucket to the Storage tab to make its log and event data contents visible for indexing.
Check permissions for imported buckets.To import a bucket, the ChaosSearch policy that is in use for the deployed user must have permission to access the designated bucket. If the permissions are not in place and correct, import will fail. For more information on bucket permissions, see the Configure Cloud Storage Accesstopic and its subtopics such as IAM Role Policy Permissions .
To import a bucket:
- Open the ChaosSearch console Storage tab.
- Click the vertical ellipses in the left menu and select Import Bucket.
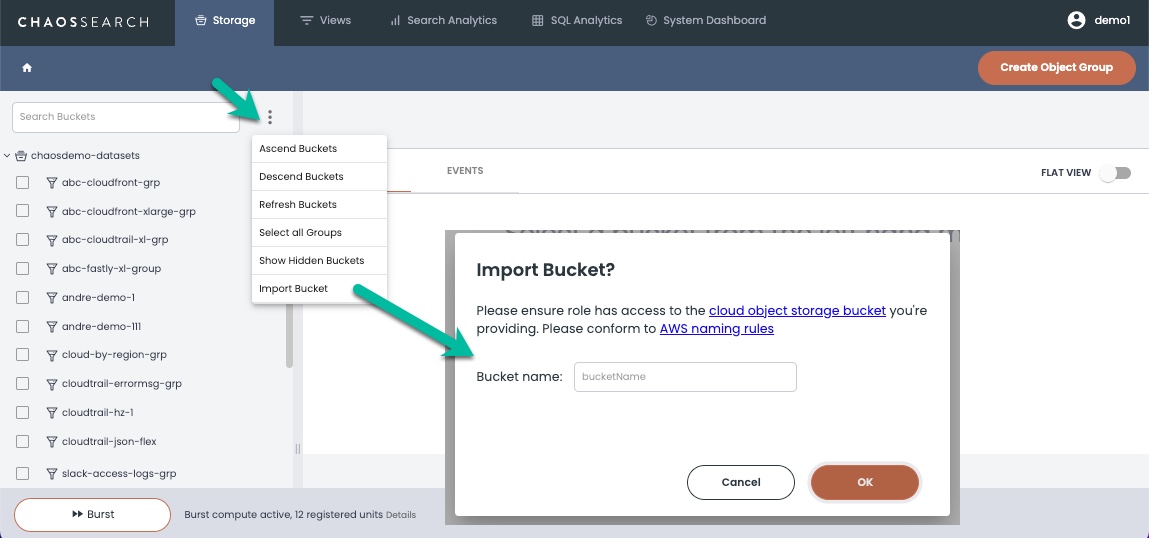
- In the Import Bucket pop-up window, type the name of the bucket that you want to import, then click OK. If successful, the bucket is added to the left navigation list. In some cases, the bucket could already be in the left list, but the contents were not accessible when you clicked the bucket. With the permission change and import, you should be able to navigate into the bucket to see its contents for object groups.
Import troubleshootingIf the import fails and displays the
Please check cross account bucket permissionserror, be sure to verify that the ChaosSearch user has bucket permissions as described in IAM Role Policy Permissions.
Updated about 1 year ago
What’s Next
After you select the bucket that contains one or more files that you want to index, you can create an object group.