Opsgenie Integration
Configure alerts to go to Opsgenie for incident management services.
Opsgenie is an incident management platform available from Atlassian.

What Does ChaosSearch Offer Opsgenie Users?
ChaosSearch has a one-directional integration with Opsgenie. It is easy to configure alerts to go to your Opsgenie account to notify the right engineers about possible incidents in their environment.
Add a Custom Webhook Integration in ChaosSearch, and start taking advantage of Opsgenie's alert and incident management platform with the ChaosSearch alert notification system.
Functionality of the Integration
When an alert is triggered in ChaosSearch, an alert is created in Opsgenie automatically through the integration.
Configuring the Integration
The Opsgenie integration has three main steps:
- Configure the Opsgenie integration support for ChaosSearch.
- Add Opsgenie as a destination in ChaosSearch for alerts.
- Create a monitor and trigger to define the alerts that are sent to Opsgenie.
Configure the Opsgenie Integration for ChaosSearch
Make sure that you complete the following prerequisites:
- Verify (or create) your Opsgenie account.
- If you are using the Free or Essentials Opsgenie Plan, create a team using Create teams in Opsgenie.
- Create a default API integration in your Opsgenie Teams settings using Create an API integration in Opsgenie
- When you have generated an API Key for the integration, copy the API Key for use in your API requests.
Add Opsgenie as a Destination in ChaosSearch
To add a destination for the Opsgenie integration:
- Log in to the ChaosSearch console as a user with Analytics access.
- On the Search Analytics tab, click Alerting in the left menu area. The Alerts page opens.
- Click Destinations.
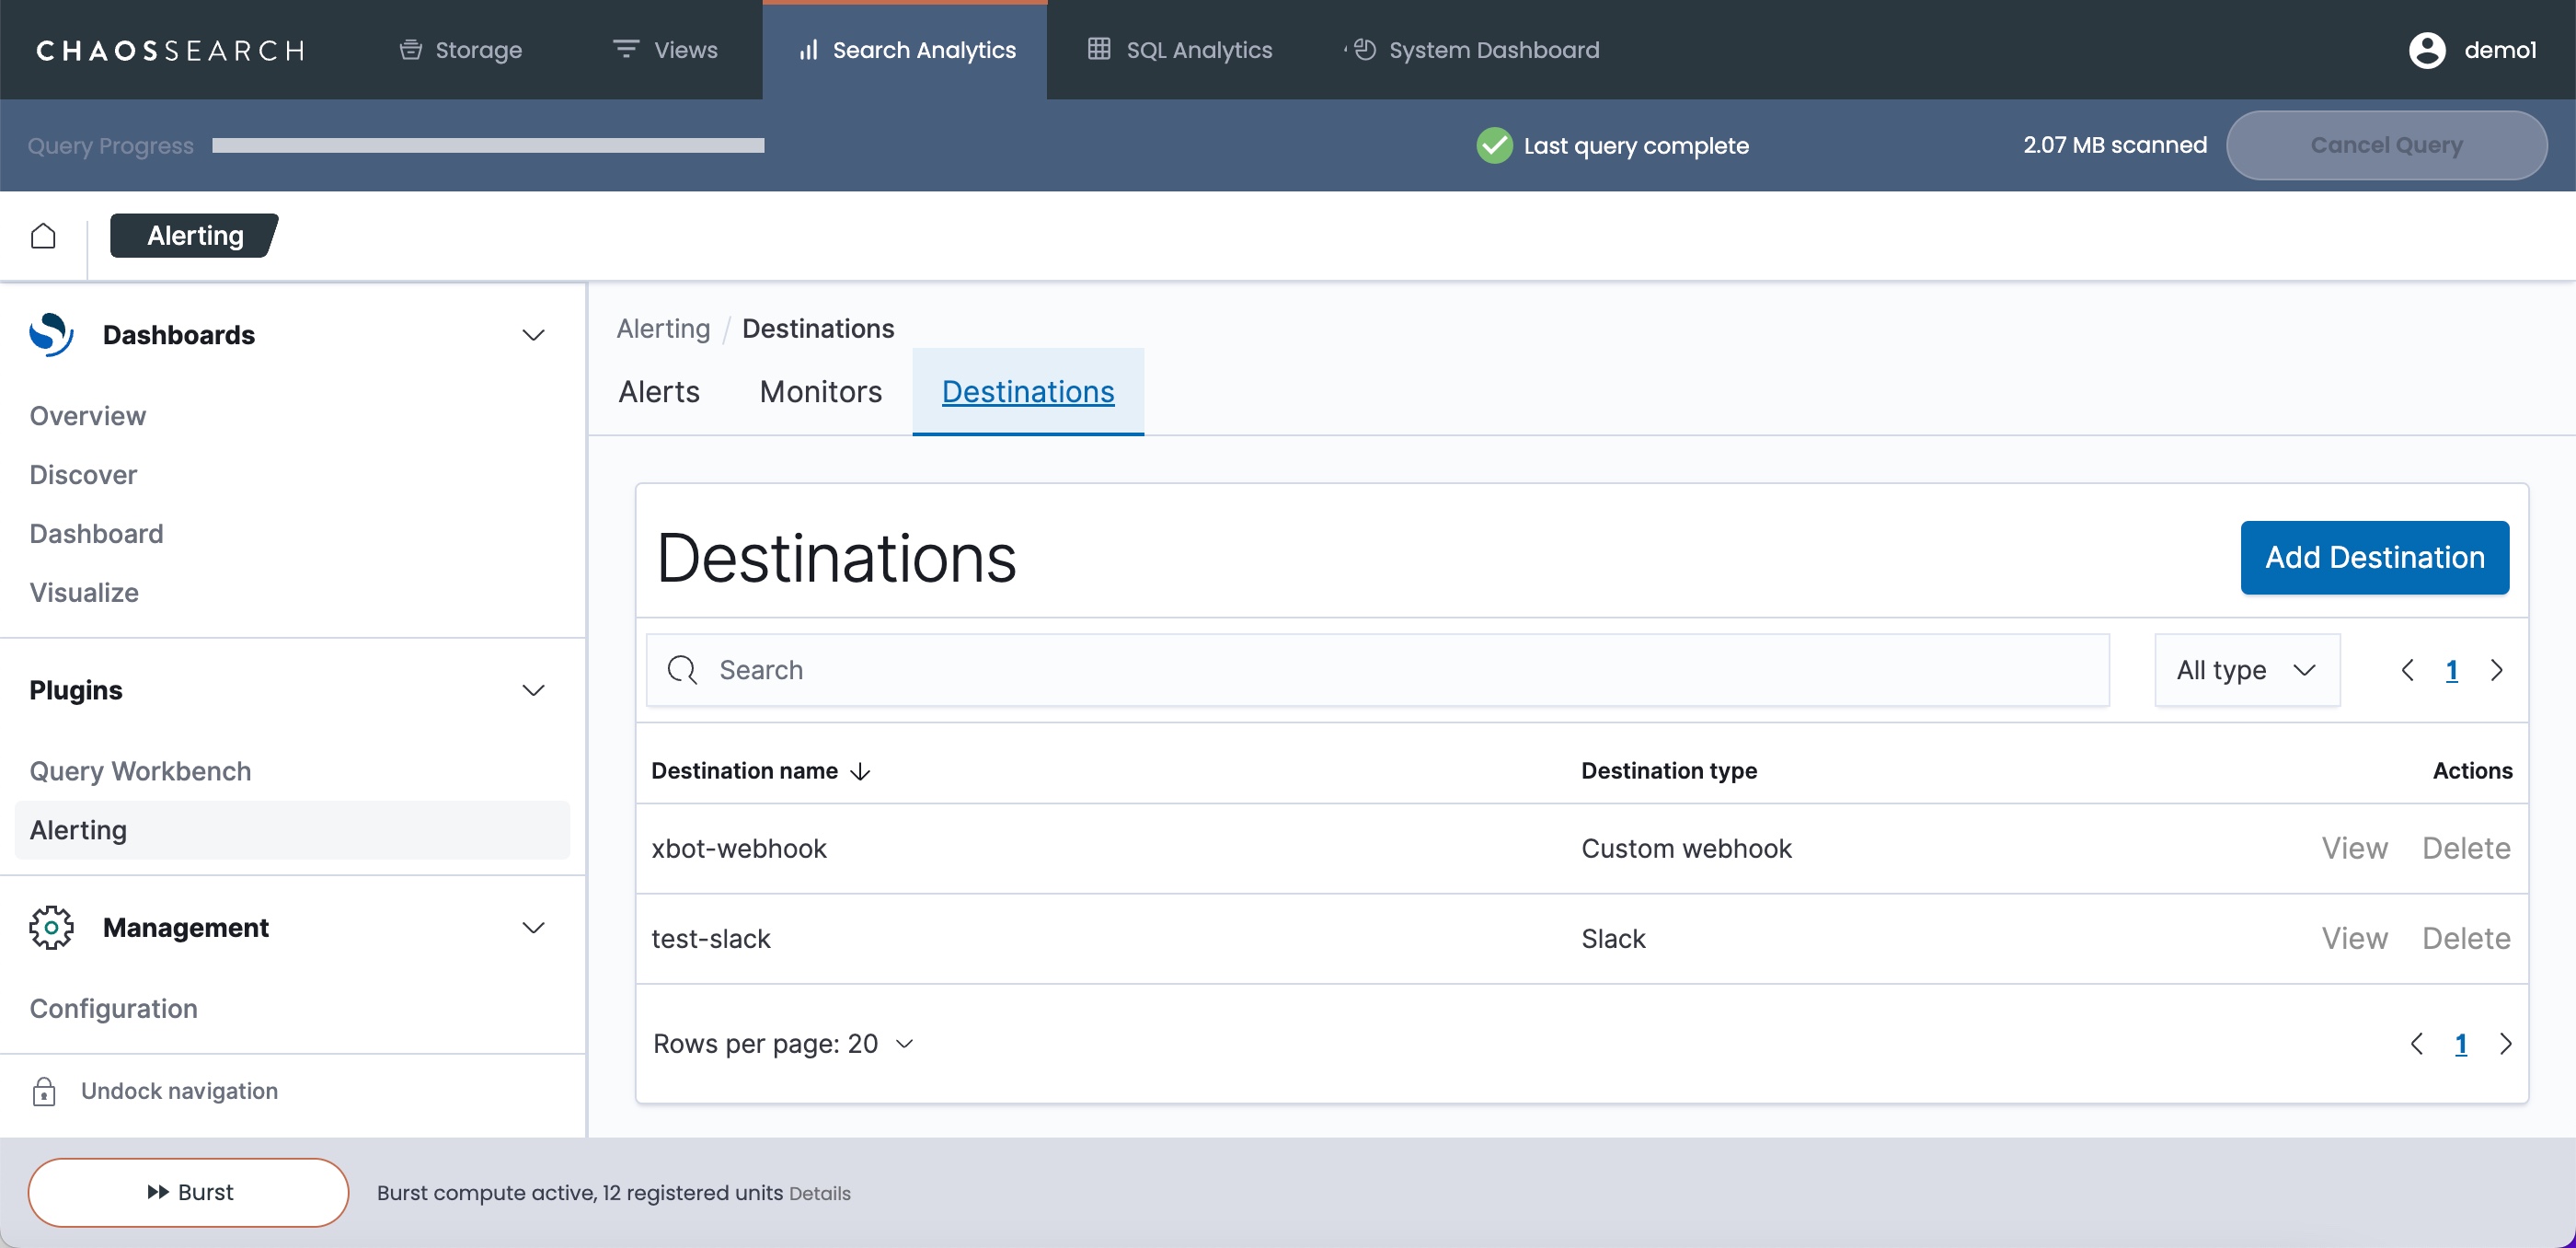
- Click Add destination.
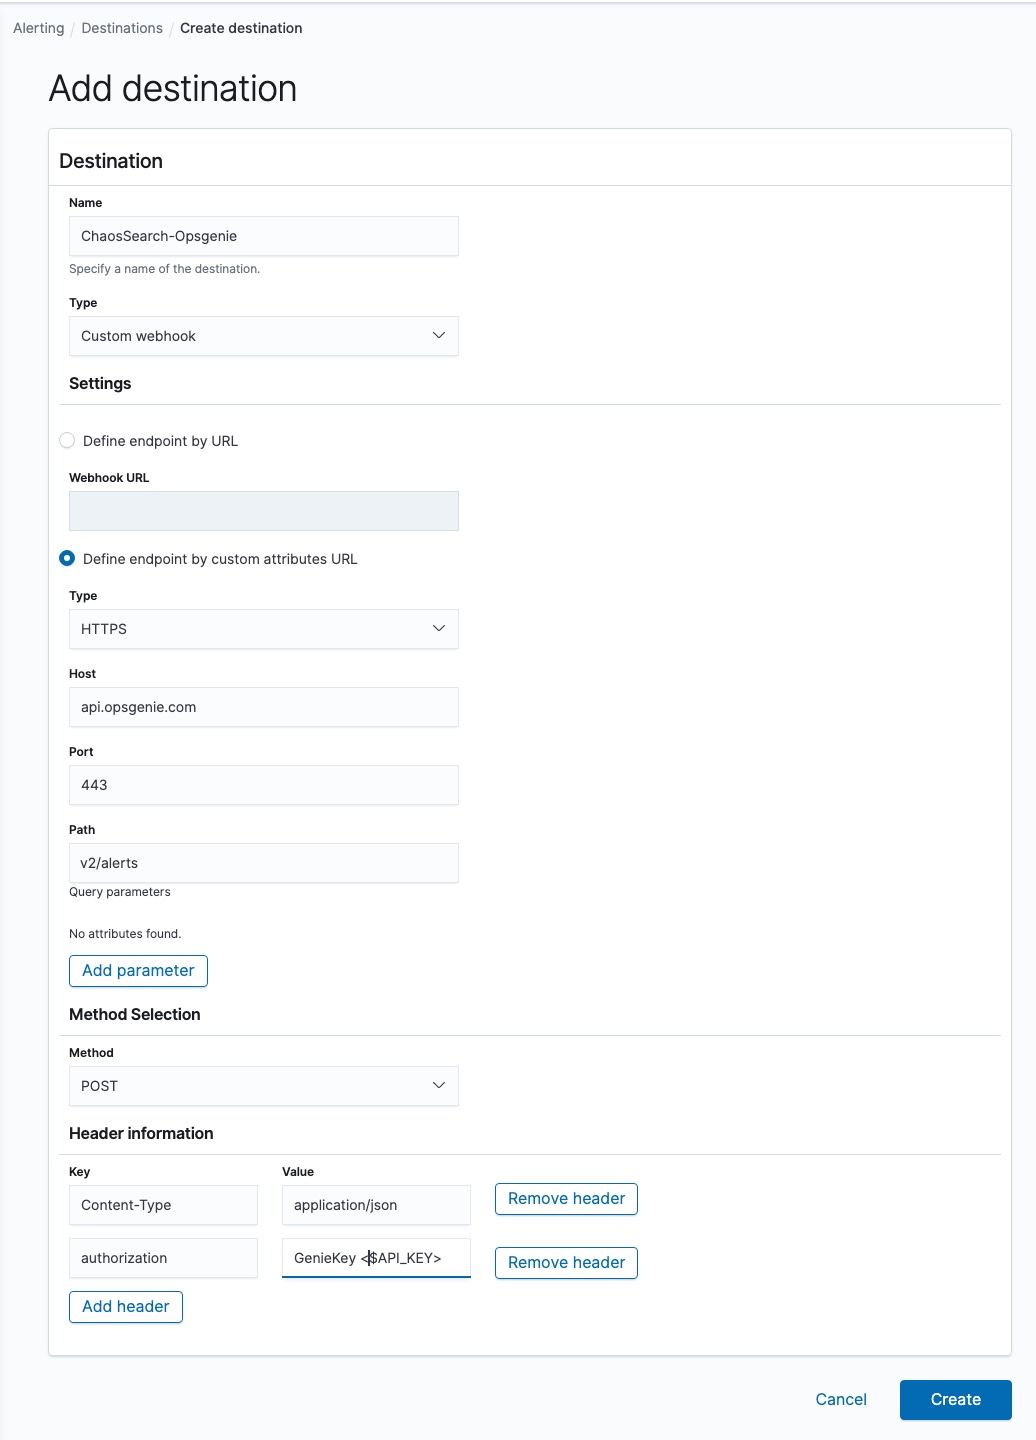
- In the Add destination window, type a name for your integration such as Opsgenie.
- In the Type field, select Custom Webhook. Some additional fields are added to the page.
- Select the Define endpoint by custom attributes URL option, and specify the following:
- In the Type field, select HTTPS.
- In the Host field, type
api.opsgenie.com(orapi.eu.opsgenie.comif you are in the EU region). - In the Port field, type 443 for the HTTPS protocol.
- In the Path section, type
v2/alerts. - Click Remove parameter to remove the empty Key/Value pair field.
- In the Method field, select POST.
- In the Header information field, click Add header to add a new empty pair of Key/Value fields.
- In the Key field, type
authorizationand in the Value field, typeGenieKey $API_KEY(where $API_KEY is the API Key from your Opsgenie API Integration). - Click Create.
Create Monitor
To create a monitor in ChaosSearch, use these instructions.
After you create the monitor, you must define the trigger as described in the same instructions.
Configure Actions SectionIn the final step of creating a trigger, the Message payload should be configured as follows:
{ "message": "{{{ctx.trigger.name}}} just entered alert status. Please investigate the issue.", "description" : "Monitor {{{ctx.monitor.name}}} \n - Trigger: {{{ctx.trigger.name}}} \n - Severity: {{ctx.trigger.severity}} \n - Period start: {{ctx.periodStart}} \n - Period end: {{ctx.periodEnd}}", "priority": "P{{ctx.trigger.severity}}"}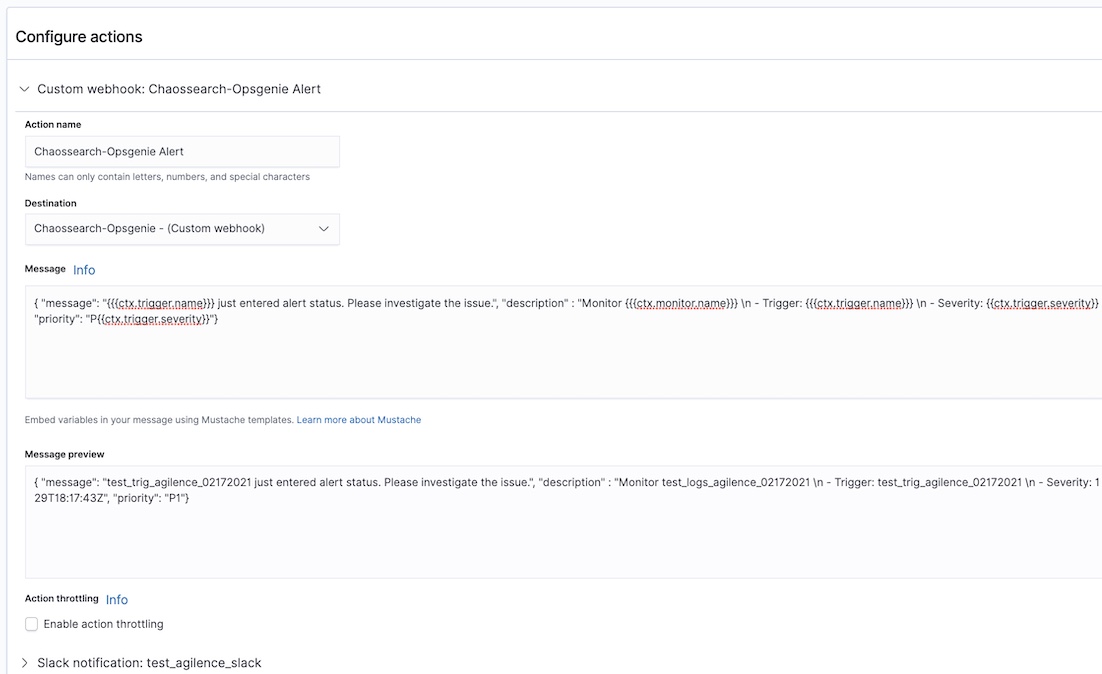
Verify the Creation of Opsgenie Alert from Opsgenie UI
In your Opsgenie UI, navigate to Alerts and verify that you can see the new Opsgenie alert that came from the ChaosSearch UI’s monitoring alert’s trigger message:

Click on the newly created Opsgenie alert and verify the detailed contents of the alert.

Updated about 1 year ago